Tuesday, December 31, 2019

Sewing Plans for 2020


Hello everyone!

Who's ready for 2020???

I am! I am!

Though 2019 started off well, I slowly ran out of steam. While I continued to sew in my real life, I have certainly neglected this blogging space.  For 2020 I am looking forward to sewing and blogging again!

Once I made the decision to return to blogging,  I started to brainstorm ideas for the upcoming year. I can definitely say I had SO many ideas!  It took a bit of thoughtful consideration in order to hone the ideas down into something more workable, and that is exactly what I want to share with you today!

To recap some, last year I decided to participate in the Sew Your View challenge on Instagram.  I successfully completed approximately 4 or 5 garments, then never picked it up from there.  It wasn't because I didn't like the challenge.  There were a few garments here or there that weren't my favorite, but a lot of the pattern choices surprised me, and were relatively easy to sew too.  I will definitely sew along again for 2020, but probably NOT every month.  

A sample of my Sew Your View creations

So what have I decided to do?

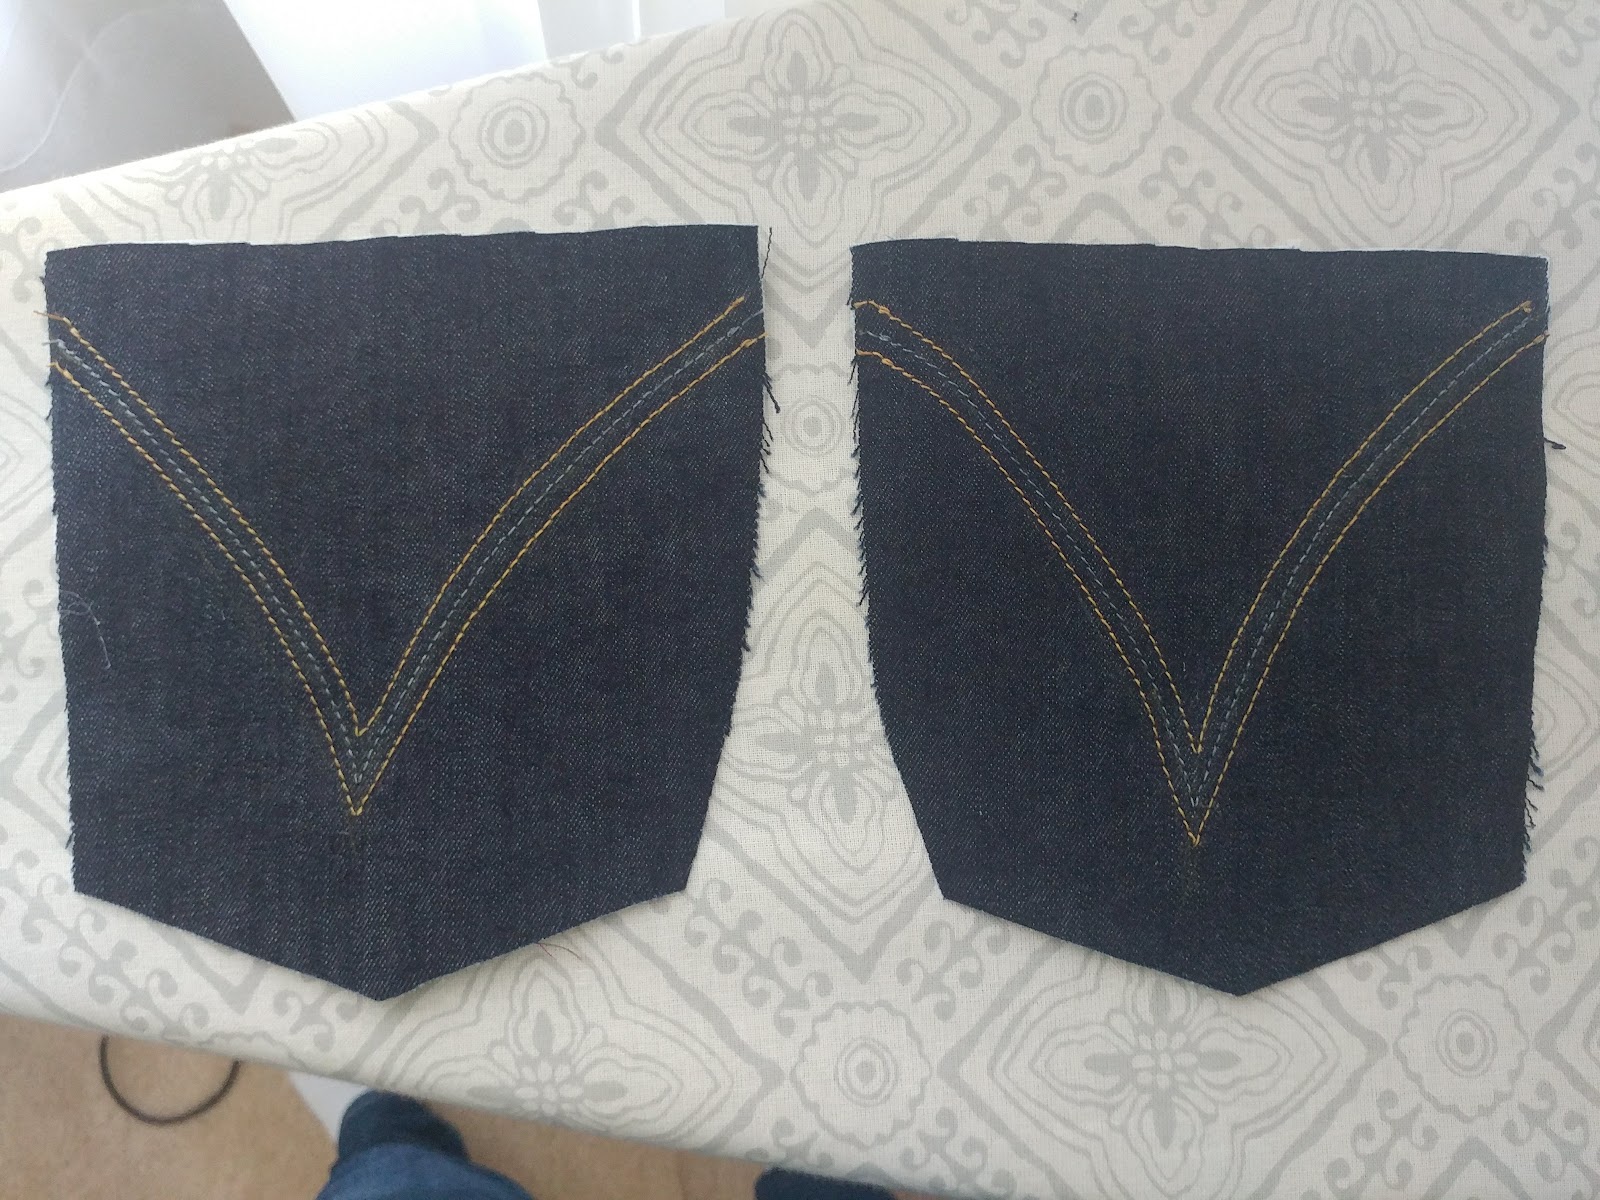
First, and foremost (and I never thought I would say this), I will be continuing my RTW Fast for the THIRD year in a row!!!!!  I must be crazy, but it only seemed natural to keep going.  I think finishing two pairs of jeans and two pairs of shorts had a lot to do with my decision.  I feel a lot better about fitting pants, and I am still in the stage where I prefer the things I sew on my frame, instead of the things that I purchased years ago.

My staple Ginger Jeans pattern
That said, I really needed a plan for the year.  I mean, a REAL plan!  I didn't want to go another year of trying to figure out my wardrobe.  And I didn't want to waste any more time--I was ready to put the pieces together now! 

Well, thanks to Alison Lumbatis at Get Your Pretty On, I have found a "cheat" sheet!  Alison is a personal stylist who posts style challenges with each season.  These usually occur in real time and are loads of fun.  I have done one in the past, but never considered sewing the items of clothing she recommends because the turnaround time once you receive the shopping list is very short (three weeks).  However, Alison also has some challenges that are not time sensitive, particularly her "Closet Staples Capsule Wardrobe Builder."  

This is a yearly challenge, so all four seasons are included, as well as a Master shopping list with photos and outfit combinations.  Do I need to tell you that this was music to my ears?!! I purchased this package a week or so ago and have started sewing through the recommended Winter pieces that I do not already have.  I can't wait to finish and start putting everything together!!  

So, my first goal is to continue sewing all my own clothing (except bras, underwear, socks, and accessories) with the yearly wardrobe plan from Alison Lumbatis as my guide.  

My second goal is my own personal challenge.  I have chosen to do the "Make Nine" challenge, except spun in a different way.  Usually this challenge is done to inspire yourself to sew nine items.  Well, I have exceeded that number of garments for the last couple of years so I never took part in this before.  However, I noticed a few sewists (Sew Natural Dane?) that used this challenge in a brand new way to choose "goal" items that they always wanted to sew for the year.  You know, things outside of their normal comfort zone of sewing that they might not otherwise do.

So, I would like to show you my Make Nine Outerwear plan...


If you have followed along with me over the years, then you know I have sewn a jacket or two here and there.  I am still proud of my Kelly Anorak, and my corduroy Mimi G Moto jacket is one I get excited about wearing.  While outerwear takes time, I love that all that time you put in translates into a garment you can wear over and over!  So, why not create nine Outerwear pieces for the year???  It is certainly something I have never done, and once finished, I would easily have a jacket or coat for every season!

My Kelly Anorak always gets love

Still a fan of Moto jackets
For my Make Nine, I have excluded cardigans.  I am not sure if cardigans (by definition) fit into the Outerwear category, but I just wanted to be clear since I sew a lot of them.  I also wanted something that would push me a bit, and cause me to organize my time, because fitting nine items into twelve months only leaves a month and a few weeks per item (yes, Math nerd here, lol).  For the patterned blocks pictured above, I still have two additional choices to make.  I am considering a beautiful trench style jacket from a La Maison Victor magazine I bought a few months ago.  I am also torn on a nice utility jacket. Perhaps Simplicity 8700, or another Kelly Anorak in the View with the collar, since I already have the pattern.  Who knows, I may be open to the idea of throwing a vest in, since I only have one of those in my closet right now. We shall see!

So my second goal is to participate in the Make Nine challenge by sewing nine outerwear pieces, not counting cardigans.

Overall, I am so pumped to enter a new decade!!!  Thank you all for hanging in there with me, and coming along on my sewing journey.  This blog is not only about me and all the things I make or don't make.  It is about learning from each other.  I hope that each post you find something that you can take with you on your own journey, or maybe share with someone else.

Here's to 2020!

Stay sew-filled!

Thursday, October 10, 2019

Summer wardrobe all wrapped up

Hello everyone!

Well, it was bound to happen!  It is now October, the summer has effectively flown by, and the first peeks of Fall are coming through without even one post from me.  As you can imagine, I have been entrenched in caring for my husband and kids; however,  a big portion of my hiatus was dealing with a terrible bout of tendinitis in my left arm.  I was in so much pain I didn't even want to sew!  This issue has been a chronic one since I had my son three years ago, but this last time was almost unbearable. I laid around A LOT, and activities of daily living were extremely difficult. 

Thankfully, after a few MD appointments, a prescription for steroids, and a natural joint supplement, I began to do SO MUCH better!  I still have some days of dull aches, but every day I feel better and better.  Since I am back working with toddlers I have to be careful not to re-injure my arm, but every "good day" has been filled with sewing in small increments.

Today I am going to talk a little bit about my summer wardrobe pieces, and how my wardrobe plans turned out. Remember this?


I attempted all of the items (except the second pair of shorts, more on that later), but I have to be honest and say that there was a lot of "meh" items so some of the items are unfinished.  In fact, I wandered so deep into "meh" land, I almost thought I wouldn't get out!  So, some of these items I have taken photos in, while others are on my dressform.

My first piece is the Sewaholic Renfrew done with a short sleeve.  I have made other versions of this top (cowl neckline, V neckline, long-sleeve) and this was the only view I had left to make.  Since my wardrobe has been lacking in solid colors, I decided on this lovely navy poly-rayon knit I purchased from Fine Fabrics this year.  For some reason, it came out a tad snug around my hips, and I will have to adjust that in future versions.


  However, it does pair well with the shorts I ended up making:


As you can tell from my pasty pale legs, I am not a consistent shorts wearer--even during the summer months!  I am not sure why.  My legs are not the feature I like to play up most, so I guess I dress accordingly.  In fact, most of my pants are capri or full length for summer.  

Anyhow, the shorts shown above are not what I originally wanted to make for my summer wardrobe. Let me show you the wearable muslin I created before I decided to go in a different direction: 


I started out with S1167, but ended up having quite a few fit challenges.  Once I sorted out the back rise  (which was too low) and applied the waistband, I had pocket gaping.  Not giving up, I made a full seat adjustment, re-worked the pockets, sewed up a second pair, and STILL had pocket gaping.  Besides the gaping, I really like the shorts!   I could probably wear them with a longer top that covers the pockets, but as you can see, I haven't even bothered to put the button snap on yet.  Yeah, I'm just not that into them...

After the disappointment of S1167, I turned to my beloved Ginger jeans pattern, and the wheels began turning... Why not turn my beloved jeans pattern into shorts??!!! So,  I created a pants block from the Ginger jeans, and reduced the length by about 9 inches in order to get the pair shown here.  I also combined the back yoke to the back pants, and kept the topstitching to a minimal so that it mimicked all of the trouser-like features of S1167.  

It was a good solution to a frustrating problem!!!!  Also, it made sewing these up so much easier, and I now have a solid foundation for making future pairs of shorts next summer.  My only change would be to create a pocket facing that attaches to the lining so that there is no show through. This will also allow me to use all the pretty fat quarters that I stocked up on in the last $1 sale at Joanns!


For the sleeveless tank top, I chose another Fine Fabrics purchase.  This time it was a blue marbled rib knit that looked like it was begging to be a tank!  Since it was a quick sew I figured I wasn't going to muslin it...but ended up regretting that choice.  In short, the armholes were huge on me!  I fixed that by sewing deeper into the side seams, and the end results were actually very nice:


This tank is my husband's favorite!! While I don't think I will revisit this pattern, this item has gotten worn so many times--because when your hubby says he likes something, you just put it into the rotation!!!


I do like the split hem on this one.  There is just enough length without it going overboard.


Here is my total me-made look!  I do like that I have additional choices to wear with my kimono.  For my next wardrobe, I think I will choose fabrics around a print again, but probably not my topper.  I found it hard to integrate the clothing underneath the topper without making EVERYTHING a solid color--still learning!  But I can see the appeal of sewing separates that play well together!

My last top, TC1617, a sleeveless blouse, is actually a great pattern that I just feel "meh" about.  I really liked the pattern instructions for this one.  I love how they had you create the front placket, and although there is LOTS of hand sewing, I didn't mind that either.  I believe this is a well made shirt pattern, and I am convinced I will be trying other versions for Fall--especially the hidden button placket, which I have never done before.

The thing I struggled with is the length of high-low hem for the back.  It just looks ridiculous to me!!  Right now this top has been in timeout until I can decide on the changes that will bring me a love for this item, lol!  It is a rayon crepon from Fine Fabrics (I only know because I saw it online too).


With patterns that have darts, I find that I have to move the bust dart down about 1/2."  That is what I did to this shirt, and it fits well.  Again, I am still learning fit with woven fabrics so I am being kind to myself in this area.  

Overall, I created three wearable items out of the five.  I can live with those numbers and regroup for next year, lol!  You may see other mini-wardrobes on my blog throughout the rest of this year, but I will be moving back to my original monthly plan of making the Sew Your View item, as well as a garment of my choosing.

Stay sew filled!

Tuesday, June 4, 2019

Closet Case Ginger Jeans

Hello everyone!

Today I am finally getting a chance to show you what I made over a month ago!  Yes, my first pair of handmade skinny jeans are completed:


These are the beloved Closet Case Ginger Jeans!  They are mid-rise, and I have owned the pattern since last year.  If you know my story then you know I have struggled in the area of pants making before.  I have had a lot of "failed" attempts at fitting my curvy body, and so I have avoided pants patterns because of it.  

In April I decided that I would work on the Ginger jeans in my spare time, and see if I could get a fit I was happy with. It was a way of taking the pressure off of the whole process, and learning from what didn't work for previous versions.  In all actuality, I think the drafting for this pattern helped to sway my results in the right direction!  Some other things I did that were helpful:


This is what the website says about this pattern: "Our best-selling Ginger Jeans are now available in a universally flattering mid-rise cut! These jeans are the daily staple you’ll reach for again and again.

This PDF only jeans pattern includes a skinny and stovepipe leg option, both options featuring a tummy-slimming pocket stay. Hitting just below the belly button (about halfway between the low and high rise of the original Ginger Jeans), the Mid-Rise Ginger Jeans feature subtly shaped back pockets to highlight the curve of the bum, slimming side seams and a higher back rise to prevent peekabooty. Designed for stretch denim, Ginger Jeans will hug you in all the right places."
The version I chose to make is View B, the mid-rise with skinny legs.  I cut a size 10 for the front, and graded to a 12 at the hips.  For the back, I cut a size 12 throughout.  My additional adjustments were as follows:
  • 1/2" swayback adjustment
  • 1 1/4" full seat adjustment (which changed my LIFE)
  • 1/4" crotch lengthen
  • 1/2" hyperextended calf 
  • scooped out the back curve
For fabric I used a stretch denim from my stash.  It is slightly stretchy, probably 1-2% in a mid-weight.

My waist (30") and hip measurement (40") fell perfectly within a size 12, but for some reason, I have always had SO MUCH EXCESS at the center front when I followed my hip measurement.  I saw in the Bluprint class that I could be smaller in those areas and need to size down, and grade out for my hips.  That made total sense!

Anyhow, there is a method Kathleen Cheetham uses to help you measure your body and determine whether this is the right choice for you.  I tried it, and it worked well for me.  I can't wait to see if it is helpful for other pants I sew.

Construction
Much of the construction for these pants was easy.  The only places I needed additional help was with the fly front. When I sewed the fly front on my first attempt, it just didn't sit right.  The zipper was not positioned deep enough to allow for adequate closure of the pants.  So, I took it out and restitched it with the assistance of the Sew Sew Live tutorial, and it was perfect!  I mean she seriously makes it look easy peasy!  If I had three fly fronts lined up to sew, I would have stitched them one after the other!


Back Pockets/Pocket Stay
These were so much fun!!!!  I mean, the best part of jeans are creating the back pockets, right?  I knew I wanted something with angles, so I began researching some designs for inspiration.  During that search I found out that Closet Case has over 40 back pocket designs that you can download once you join their newsletter.  I knew I had been a part of their newsletter for a long time, so I searched my email and found it (yes)!

After skimming through it, I was immediately struck by this one:


It was exactly what I was looking for!  I liked the look of the "V," and cheesy enough, my name is Vanessa, so there you go!  The pockets are transposed in the picture, but I really love the shaping of these.  Once you sew them on, they look really nice.  

A word about the back pockets, though.  I basted mine on first and they were extremely low for my backside.  I ended up moving them up about an inch, and they looked much better.  If you are in doubt, check them out first before you commit and sew them on.


For the pocket stay, I decided to use some cotton sateen from my stash.  It was leftover from the dress I wanted to make for my brother's wedding a few years ago, and I still very much loved it and thought it would be a nice sight when pulling on these jeans.  I must say, I LOVE the pocket stay!  I am not sure if it slims my tummy, but I love the fact that it does not hang freely, and is enclosed within the CF and waistband.


Flat-fell seams
For these jeans, you flat-fell your seams on the wrong side.  However, you can flat fell the groin seam if you choose.  I decided to go with the serged flat fell seam for the inside. I serged my seam edges first (with cut feature disabled), stitched my seams right sides together, then trimmed one side to 1/4" and pressed the other serged seam over the cut edge.  You can read about it here.

Topstitching 
I admit I wasn't nervous about most of the topstitching, only about getting the fly front curve right, and the bartacked areas, since I have to put those settings in my machine myself.  I practiced the topstitching on scraps, and find that visualizing a specific spot on my presser foot, and keeping that spot lined up helped the most.  

There is also a fly front guide that works beautifully.  I traced my stitch lines onto my jeans with chalk, and had no issues.  If you have never made jeans before, you will use LOTS of topstitching thread. LOTS!  The best tip I read from the pattern (there are many of them) is to use topstitching thread on the top, and regular thread for your bobbin.  Why, of course!! I didn't think of that before, even when I made pants in the past.  It significantly decreases how much topstitching thread you need, but it also makes your thread changes a lot faster since you are only switching out the thread for the needle.

Waistband
The waistband is constructed by a front and back piece.  There is a slight curve to the band, but due to my swayback, I had to cut some darts on the pattern piece to create a more curved piece (see here).  There is also additional length to the waistband so that you have what you need to line up the edges at CF.

I will say that my machine had a lot of issues while topstitching the waistband, due to all the layers of denim.  There are some snarled threads on the underside, but that's ok.  I re-tried it a couple of times, and even changed my needle/tension, but it still did it, so I left it well alone.  For the buttonhole, I had to change to regular thread, which I matched as best I could.  I think I will just use regular thread on my next pair (of course there will be more).

Pattern Adjustments/final fitting
It's been a while so I can't quite remember the order of construction I went through.  However, I do know that I followed the pattern instructions to baste for fit.  After I made all the modifications, I took out the basting stitches and did the final stitching.  I think the front and back were fully assembled and topstitched at this point, so it is not as extensive as it sounds.


I also used a pair of RTW jeans (on the right above) from my closet to create the shape I wanted for my skinny jeans.  These were an Old Navy pair I bought years ago.  They fit well, but had faded quite a bunch.  The Ginger jeans still had quite a bit of excess fabric I could remove to get a better shape.  Here is what my pattern looked like after I transferred the changes:


The green marker is where I removed additional fabric.  I have left the pattern intact in case I use a denim with less stretch in the future.  I can always adjust, but those lines are a guide for where I like the shaping to occur.

Finishing
Thankfully I purchased the Ginger Jeans kit last year when I got the pattern.  It has all the rivets, needles, and buttons you need to add those finishing touches to your pants. You can definitely individually source the items, but I have a soft spot for reasonably priced kits that make it easy.  

Installing the rivets were not a problem, but I had to limit the amount I used because I just could not set them in some of the bulkier areas.  I placed them on the front, but left off the rest for the back.  I will try again with a lighter weight denim.


I can gladly say that the final result of these jeans fits me MUCH better than my RTW pair!  But that is probably because my butt has room, and my jeans don't gap!

Speaking of the next pair, I will probably adjust the rise slightly.  Right now they feel more high-waisted than mid-rise, so I will decrease that some.  Other than that, I LOVE THESE!!!!!!!!!!  


Stay sew-filled!


Saturday, May 25, 2019

Rock Your Style/Summer Plans

Hello everyone!

I am back to share my second look for the recent photoshoot I did with Atlanta Sewing style.  The theme was "Rock Your Style."  In other words, do your thang!  It actually took me a few weeks to figure out what I wanted my "thang" to be.


I have talked before about how I have a classic style with a bit of trend, and love to air on the side of sophistication.  Keeping this in mind, and wanting to do something with stripes, I decided to make the beloved Isla dress in black and cream stripes:


I have made this dress many times before, so please see here if you would like details on the construction, and a review of the pattern.  

We also took more group photos!!  


You can see the myriad of styles, and how well they blend together.  

I am forever grateful that I got to participate in this event, and look forward to more in the future (wink, wink).

For now, I am getting ready for the summer!  My kids are officially out of school, and I am officially off of work.  It is one of the best times of the year, but it is also when I tend to fade away from blogging.  This year I plan to RESIST the fade...(lol)

While I have been pleased with keeping my sewing plans to two garments a month, I am going to switch that up some for June, July, and August.  I will still do the SYV sewalong, but I would like to work on a mini-capsule.  I have been following along with TomKat Stitchery on YT, and love seeing all of the lookbooks from the garments that she sews.  Currently, she has been sewing "modules" recommended by another Youtuber named Christie Ressel.  

Once I checked out an explanation of the modules, I was hooked!  I can't wait to try it!  Here is the premise of it:

6 pieces of the following create 12 outfit combinations:

  • 1 topper
  • 3 tops
  • 2 bottoms
Each top must coordinate with each bottom, AND if you sew another module up in a complementary color, the outfit combinations go way up!

So, taking this simple formula, I pulled out my favorite kimono as an inspiration piece:


I will use it as a topper, and pull colors from it.  Here are some of my thoughts so far:

1. Sewaholic Renfrew scoop neck tee in a solid navy knit
2. Simplicity shorts in denim
3. Simplicity shorts in white or cotton twill in teal (wouldn't that be pretty?)
4. Still undecided about the other two top choices, but they will be something that coordinate with the pants.  Maybe a sleeveless blouse and sleeveless top?


So expect a slight change of directions for until Fall cycles back around.  I look forward to posting again soon.

Stay sew-filled!


Sunday, May 5, 2019

Springing Florals

Hello everyone!  

I hope you are enjoying the weekend!

Today I am so excited to share the reveal of Atlanta Sewing Style's recent photoshoot!! The first look I made was for the  "Springing Florals" theme.  As soon as Spring gets here, I find that florals are on my mind. I just love that they feel bright, beautiful, and full of life.

However, when I first heard of the theme, I admit to being stumped as to what I would sew. That's when I found this teal jersey print at Fine Fabrics.  I was immediately drawn to the bold beautiful colors, and loved that the floral motif was whispered throughout.  I found the Mccalls 6073 maxi version in my pattern stash, and my look was born:


This is a size 12 with the following adjustments:
  • 3/8" forward shoulder
  • 1/2" dart removed at bustline for neckline gaping
  • front crossover tacked for modesty
Though the adjustments do not sound like much, the main amount of work for this maxi was the bodice.  It took me three tries to get rid of the neckline gaping, and get the fit to a place I was happy with.  In hindsight I should have anticipated this because I have had issues with gaping in other necklines many times before.  Gladly, once I got the gaping under control, the front crossover fell at a really nice place, and all I needed was a tack to keep it comfortably closed.  Voila! No cami or tank underneath needed, lol!


This maxi dress also has lovely features like gathering at the bodice, and slight gathering at the back waist.  When I read reviews of other versions for this dress on Patternreview I saw that the elastic casing was a lot of times left out.  In my opinion, I decided to put the waist elastic in because it cinches my waist just right, and enhances the back gathers.  While sewing this, you may want to take that into account and adjust this feature for what works best for you.

Overall, this is a lovely pattern for a confident beginner and up--once you get the bodice fitted for your liking.  

But I would be remiss if I didn't tell you a little bit more about our photo shoot!!  There were a lot of crazy talented sewists there, and they brought the "heat" in so many ways!!!


Personally I was just SO inspired by everyone's interpretation of florals for Spring!! So many sew sisters coming together, showcasing their craft, and letting their creativity speak for itself.  We represent Atlanta, and we love to sew!  

The host location was Topstitch lounge--the cutest fabric shop inside of Ponce City Market.  If you ever get a chance to visit, please go.  You will be glad you did! And if you like Indie patterns, then your heart will be fulfilled because they have an entire wall of just about every independant pattern company.  

Here are a few photos of the inside:


The day was so amazing and I was glad to be a part!

Would you like to be a part?  Check out @Atlanta Sewing Style to follow along with the fun, or join in with us too!  Stay tuned for more looks to be announced next month.

Now, who's in love with the maxi dress as much as I am?? More maxis please!!!


Stay sew filled!

Saturday, May 4, 2019

Catching up, and May plans

Hello everyone!

I am beginning to believe that there must be a few times when you follow the plan, and other times that you just go rogue!!! LOL!  For April, I pretty much went rogue.  I loved my plans for the month, but since I was working on a prior commitment, all of my sewing time got squeezed out.

However, I did have a BLAST at Project Sew Atlanta!!!!!  I don't even think I can find the words to describe all of the beautiful sewists I met, or how nice everyone was.  The event was a collaboration between @thatssewmonica and @atlantasewingstyle.  Monica, who also hosts the monthly Sew Your View on IG, was AMAZING!!!!  So humble, so sweet, so beautiful, and such a warm personality.  I only wish I would have taken more photos!!!  Nikki, who co-hosted the event, heads up Atlanta Sewing Style. It was also a pleasure to meet her!  She has a wonderful vision for Atlanta sewists, and has created this group (which I am a part of) to bring the local sewing community together in a fun and creative way.


This is the only photo I captured, and it was near the beginning of the event, so everyone was setting up their spaces. We were all in a big room filled with tables and outlet access for all our machines.  There were groups of four to each table, and additional ironing stations in multiple corners.  There was also a cutting table in the center of the room, and some benches pushed together for additional layout space.  The setup gave everyone a chance to chat with their respective "group" but also not feel cramped in the space.

For the morning there was coffee and light refreshments, followed by pizza during the afternoon.  I stayed and sewed until 12:30pm, but I wished I could have been there for the entire event which ended at 4.  Right before I left there was a time of sharing where everyone gathered around and shared their social media handles and information.  There was just so much inspiration in one room!!! So many creative minds working on such beautiful things.  

Actually, there is already another event coming up on May 25th!  If this sounds like something you would love to attend, and you live in the Atlanta area, or are willing to travel (we had someone drive from Florida) then follow @atlantasewingstyle. There will be some exciting things showcased starting the weekend of May 4th!

That said, here is the Isla dress I completed at Project Sew:


I have really learned to maximize my time at sew events!  Yes, I love to socialize, but I also want to go home with a finished garment.  So, I usually bring TNTs when I have extended sewing time.  That way I can sew without pattern instructions, and still chat with others without gettting distracted from what I am doing.

I am sure you are wondering what I will be doing for Me Made May 2019.  Last year I had so much fun taking daily photos, and participating in an online FB group contest, BUT this year I won't be as intensive.  I will still be celebrating my handmades "in the spirit of MMMay, yet at this point in my sewing journey I think my next challenge would be to work on pants. 

I haven't chosen any patterns for the month yet, but I am excited about the Sew Your View pattern choice for May:


I really love the longer length variations, and the sleeve detail on View C is such a different take on a shirt dress.  Again, I will be looking through my stash to see if I can utilize fabric I already have.  The fabric recommendations are: chambray, cotton, linen, seersucker and shirting.  I am certain I still have some shirtings, though not positive I have enough yardage.  This one is a real fabric hog, lol!

Overall, I am SO thankful to be moved back into my home! I am looking forward to this month, being back in my sewing closet to sew, sew, sew!

Stay sew-filled!  


Thursday, April 11, 2019

March Recap and April plans

Hello everyone!

I hope your week is going well!  My kids were home on Spring Break last week, and I did not get as much done as I would liked, lol!  Sometimes the balance of life and family is hard.  I mean, one part of me wants to get a hundred sewing projects done, but another part wants to embrace the days with my kids that I know I will long for later.  

So, while I have a plentiful recap to share with you today, I am making this a "light" planning month because I have a project I am working on at the same time, and I don't think it will leave enough room to squeeze in other things.  I hope to share more about this soon...

Here are all of the garments I completed for March:

I still have to blog the Mccalls skirt, but here is a Sneak Peek as to how it turned out!


I must say that March was fairly productive for me.  I cannot attribute that to anything except being able to find small pockets of time to sew.  My son remarked that I am sewing things more quickly, and he was proud of the quality of my work.  To be honest, I hadn't even thought of that.  I do think I have been working on things that don't require me to second guess the pattern instructions, but I have also enjoyed making patterns that have a video sew along.  Sometimes I just pop on a video because I am too lazy to open up the instructions and actually read them (long days, busy life, tired mind, lol).  But, hey, it has been working!

Out of all the garments I made, I have worn the Mimi G tops the most.  The weather here has still been so unpredictable that I haven't gotten a chance to wear my dresses, but I will! We are finally experiencing temps in the 70s, and I fully plan to enjoy the weather. I think that overall, the Mccalls skirt is my favorite.  It has been so long since I made or even wore a skirt, lol!  To make one that fits so well--who misses RTW???  Not me!

This month I will probably forgo sewing a pattern of my choice.  However, I do plan on attending Project Sew Atlanta this weekend, and if I can get the pieces cut out, I will work on this.  If not, I have a few cardigan patterns already cut out and ready to sew, and I will take those along instead.  I guess you will have to stay tuned to see what I end up doing, lol.


This month the Sew Your View sew along is an Indie choice--the Erin Dress by Style Sew Me. This will be my first time sewing one of her patterns.

I will definitely make the dress version, and I am nervous!!!  It is such a stylish pattern, but not my style, and I am not sure if I will pull off the "look."  But then again, this is the place where creativity reigns!  I do LOVE the ties at the hem...LOVE!  I am working on making this my own, and must say that Crystal's version (@Crystalsewsandstuff) is awesome!!!!  I only hope to make a version as fabulous as hers!

While on Spring break last week I did get a chance to look at my quarterly goals.  This is something new I wanted to do this year to help me stay on track for the year.  Well, I put together a small graph to represent what my January, February, and March looked like:


I made a total of 10 pieces!  That means I am 4 garments past my goal of 2 garments a month.  I am excited to see that, but more than anything, I do believe I have learned so many wonderful things this year already.  

For starters, I am starting to like wovens.  While I lean toward jersey and knit fabric, the world of wovens is really opening up to me.  I love the opportunity to finish off seams beautifully, and the construction details are really nice a lot of times.  I still am apprehensive about fitting wovens, but I usually try on what I am sewing A LOT.  That seems to help a great deal.  So, yeah...wovens!!! Who knew?

Also, the variety of things I am sewing is changing.  I tend to lean heavy on tops and dresses, but as you can see, I got a vest and jacket in there!  For the second quarter, I plan to throw in some pants/shorts/capris in order to add to this mixture.

Overall, I am happy about where I am headed this year!  Everything has assimilated well into my current wardrobe, and I have made pieces I will wear again and again.

I hope your Spring sewing is coming along well, and you are off to a great start too!  I will be back soon with a review of Mccalls 7906.

Stay sew filled!