Wednesday, August 22, 2018

Baby gift sewing and Simplicity faves

Hello everyone!

Today I am back with something you probably wouldn't expect--baby sewing!

I had the pleasure of sewing for my cousin's daughter.  They live in Germany, but have come to visit the United States for a couple of months.  Her daughter is 6 months old, and I fell in love with her the moment I met her.  She is adorable, with cute chubby cheeks, and dark brown hair.  I knew right away that I wanted to make some kind of outfit for her before they returned home.

So, this is what I came up with:


I put this adorable set together while browsing through the 3/2016 issue of Ottobre Kids magazine.  It is the Tiny Triangles tunic and Tiny Toes bottoms.  I loved the keyhole back feature on the tunic, and imagined that both pieces would be easy to sew, according to how they were rated.


The tunic called for jersey for the bodice, and viscose for the rest.  However, I decided to use a cotton interlock from Joanns (here) throughout the entire garment.  It had a small amount of stretch in it, and I thought it would work well for this project. Since I sewed this after visiting with my cousin's baby, I did not have easy access to be able to take her measurements.  That meant I had to do some guessing on the size.  After some careful thought, and size checking, I went with a size 68cm.


The back of the tunic dress has a lovely keyhole feature that finishes with a narrow hem.  Originally I took out my narrow hem foot, and practiced this stitch on a scrap piece of fabric.  No matter how much I tried, my edge was hit or miss.  Sometimes I could get it to catch, and other times I could not.  I decided to turn to my old faithful instead--glue, lol!  I used a glue stick to turn a scant 1/8" twice and stitched it down easily.  I hope to get better with my narrow hem foot in the future.


The rest of the binding went on easily.  It was a lovely coordinate rib knit I bought at Joanns as well. For the snaps, I used sew-on ones.  It was my first time using those, and it worked out beautifully.  

Turning to the under pants, you can see that the original design includes a cute ribbon detail:


My modification here was to leave off the ribbons, and keep the under pants simple.  Besides, they would surely get covered up by the tunic!

I used a contrasting fabric for the facing to the leg openings, so it created a nice effect to balance out some of the butterfly print.  I don't like to overwhelm with prints, but that also means I sometimes don't know when to stop editing!  In this case, I am happy with the result!


As you can see, I guessed on the elastic length for the leg openings as well.  I hope I came close without overdoing it.  I plan on mailing this outfit to my parent's house, and hope to get a photo once they try it on baby girl.  Only then will I see if all my approximations have paid off!

Overall, I am always curious as to whether Ottobre's pattern ratings live up to their name.  In this case, both of these patterns do.  The dress and under pants were easy to construct, and an advanced beginner could put these together without any issues.  Also, who doesn't love all the cute little details that Ottobre offers?  I will have to revisit these patterns for my baby boy soon.

The final piece is a headband I have made before.  It is by Coral and Co., and it is a free download that you can find here.  It is SUPER simple to make, and looks so cute when you are done.  I made it once before for my best friend's baby shower, and this will continue to be my go-to headband.


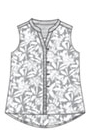
Now that I am finished with this, I plan on turning my attention back to the Kalle tunic, and sewing it up in the lovely fabric I showed you in my last post:


I will work on a few simple adjustments, and go from there.  A big part of me is really excited, but another part is a little nervous because I REALLY like this fabric, lol!  Anyhow, I plan on jumping in and seeing if I can get it done before the month is out.  If I do, I will work on a few unfinished garments before we move into September.  For this version, I am thinking I might try the pocket...

Moving on, I am patiently waiting for a Simplicity sale so I can snatch up some goodies I have been eyeing since the Fall pattern release.

Here are some of my thoughts:

YES!!!!!! I have been wanting to sew my husband a button up shirt for a while, but I wanted to practice on myself first, lol!  He was reluctant to this idea at first, but is starting to warm up to it as he has started to see some of the more recent things I have sewn.  Btw, just so you know, my hubby is  picky.  He is very supportive of things I sew; however, he has always been extra picky on things he buys or receives.  But, regardless of how he feels, I am getting this pattern!!!!!

This one is all about the top for me.  I like the pants, but the top is just so cute!  I have lots of lace, and I am always looking for ways to use it.  I love the angle of the placement for the insert, and think it will be perfect for Fall.

Now that I have been wearing more skirts (I still have two pencil skirts I haven't blogged), I have been drawn to skirt patterns.  I absolutely love the waist detailing on this skirt, and the optional sash version too.  The length gives it a lot of drama, but the shorter length seems a bit more playful.  There are lots of good options here.

When I saw this cardigan, I immediately thought of a bathrobe.  Yes, I fully admit that! However, after I really looked at the line drawing, I began to really like it.  Then, I have no idea how, but I had a vision of this in a gorgeous houndstooth print with the hood and all.  I have to make it!  I mean, I never get visions of patterns dancing in my head.  It must be a sign, lol!

If I can ever get back to working out on a regular basis again, this pattern is a necessity.  I know I will purchase it and store it in my pattern binder for just the right time.  I LOVE the color blocking, and the strip of color going down the side seam of the legs.  Such a great pattern!

My last choice is another Mimi G pattern.  This one is a maybe.  I LOVE the coat, but have a feeling I already have a similar pattern in my stash.  Since I plan on sewing another jacket or coat this year (I am starting a yearly tradition), it would be a good option to have.  This is such a classic piece that would serve me well year after year.

So, come on Simplicity sale!  I have some goodies to buy!

Alright, I hope to see you back again soon with a finished Kalle!  
Stay sew-filled!


Monday, August 13, 2018

Kalle Tunic

Hello everyone!!!

Don't mind me as  I HAPPY dance today!

My Kalle tunic is finished!! Granted, this is my "wearable muslin," but it is also another garment that I will add to one of my proudest sewing moments.  Even after wearing it, I still could not believe I made it:


Ok, I promise not to ramble about how excited I am about this tunic.  Instead, I will fill you in on the details by starting with the fabric I used.  There is a small inspiration for it...You see when I made my youngest son his first vest, I used this cotton shirting and solid blue lining to come up with a winning combination:


A part of me wishes this vest still fit him because it was just the cutest!  But since it doesn't, I thought I would revisit my leftover fabric from this project in a new way. And that is where the Kalle tunic came in!  It is part of my Spring/Summer capsule, yet I didn't get to it until now. So my thoughts for this version was to use it as a muslin to work out the fit, and practice the new-to-me technique of constructing a popover placket.  Suprisingly, it only took me one week to complete! That's a record--for me!


I cut out a size 4 according to my body measurements and the overall ease in the pattern.  Judging by the final garment, I found that the sizing was perfect for me.  My only adjustments were my usual 3/8" forward shoulder,grading to size 6, and 1" length addition.  For my next version, I am considering a slight broad shoulder adjustment for additional comfort, and a possible swayback adjustment.  I admit I tend to forget some of my fitting knowledge when it comes to wovens because, I ALWAYS sew knits, lol!  But, I want to become proficient with both.  And oddly enough, I enjoy sewing both--there are just different rules and habits to remember with each one!

Placket Construction
So, now let's get into the construction elements!  The one that sticks out with this version (View B) is the popover placket construction.  It was my first one, and I will not lie, even with the pattern instructions AND tutorial on the Closet Case website, I just couldn't figure it out.  I got quite a few steps in, but got a little lost when I pulled the placket to the right side of the shirt.  Long story short, I found an excellent video resource by Professor Pincushion here.  By watching her, I realized I was not turning the placket on itself correctly!!  After that, the placket went in smoothly, and now I marvel at how amazing they look.  It wasn't all that hard to do now that I know how to do it, lol!


Collar
When I started a shirt dress last summer (I still need to finish it), I got lots of practice with shirt collars.  I remember that the method I used was the traditional way that involved hand sewing, which I don't mind because I actually love to hand sew.  But this go round, I decided to try the Closet Case Method with (get this) no hand sewing.  I'm sure it's not exclusively a Closet Case method, but THANK YOU to whoever created this innovative way of sewing a collar and collar band.  The results are beautiful!  The only downside is that the topstitching is done on the collar band from the inside of the shirt for accuracy.  That means that the outer collar band doesn't look precise.  But, since the collar folds over that part, who would ever know??  I really liked this method.

Also, I think my collar points turned out pretty sharp.  I used a point turner, and a needle with a bit of thread to pull that edge out some.  Heather has an amazing tutorial that shows how to sew a thread tail in as you are constructing the collar so you can use that for sharp points.  You can see that here.


Buttonholes/Sewing on Buttons
Here is where things gets a little hairy.  Now I have done buttonholes many times before.  I always do a test strip, then proceed to the actual garment.  I did the same thing this time around.  Except, when I got to my garment, I sewed ALL of my buttonholes on the WRONG side of the placket!!!  I was so mortified, you all!  Thankfully, I had not cut my buttonholes open, or I would have cried.  Instead, I googled some tips on removing buttonhole stitches, and found one from Threads that worked amazingly.  Basically, remove all of the bartacks from the wrong side of the garment first, and then remove the threads from the top.  I know that sounds simple, but I can tell you that I was doing it totally wrong before I searched google.

With the tip from Threads, two things happened:

  1. The buttonhole stitches were VERY easy to remove
  2. Once the threads were removed, there was still a small noticeable blemish on the garment, but not enough to bother me.  Just a note for anyone who finds themself in this predicament too.
Once I recovered from this mistake and put all my buttonholes on the right side of the placket, I learned the most wonderful fact--my sewing machine can sew buttons on for me!!! Seriously, I love to hand-sew, but why did I not ever know this???  A little bit of tinkering, and I was able to attach all my buttons smoothly.  I share all of this to say---BRING ON THE BUTTONHOLES! :) 

I never imagined that this whole process could be streamlined in this way, and I can't wait until I sew my next Kalle!  Today's version has a lot of structure due to the fabric, but I have seen lots of great takes on this pattern in lovely fabrics with more drape.  I think I will use a more fluid fabric for my next Kalle:


I am not sure of the fabric content for this lovely, but I know it was from Fabricmart Fabrics so I will look it up.  I also got a little gung-ho and traced and cut out my sleeveless blouse from the Ottobre Woman issue this year.  I hope to get to this one sometime this month too.


Tips that helped along the way
For this shirt, I used a Frixion pen for all of my marking.  Bless you dear Frixion pen! It made this project easier to accomplish, and it worked wonders for topstitching.  My topstitching has been known to go off a little bit, and following a marked line really helped.  If you are not familiar with this pen, the mark disappears when you iron the fabric.  *Be sure to test on a piece of scrap fabric first.

One of the tools Heather from Closet Case recommends is a glue stick.  Bless you glue stick!!  When sewing in tight spaces, you don't want pins getting in the way.  So, for the bottom part of the placket, gluing it down worked so well.  I will definitely keep this in mind for future garments.

Burrito Method
This pattern also uses the burrito method to sew together the front and back shirt and yoke.  I am not going to go into this.  I will only say that it is thoroughly explained, and I think most anyone could follow the instructions well.

Hem Facing
I love how the hem of this tunic is finished because it comes out so clean and pretty.  You attach a strip of bias fabric to the edge, and it is turned inside and stitched.  I had seen a review where someone said she loved the finish, but only wish she had added some width to her bias strip.  I totally forgot this, and will do that next time.  I needed a tad more room, but just made it work:


Overall, I really LOVE this tunic shirt!  If you are in search of a great button up shirt, consider the Kalle!


Thursday, August 2, 2018

Isla dress and August sewing

Hello everyone!

I have missed you!!!! I hope that you have been filling your summer with loads of sewing, and making memories along the way.  My July turned out to be so jam-packed that I am just now getting around to updating you on how things have been going.

Let me first let you know that we are a family that likes to travel, but doesn't do so very often.  I mean, we usually plan one really good vacation a year, and do smaller trips the rest of the time.  So, when I say we traveled to three different places in one month, you can imagine that this was not our usual routine. 

Our first trip was my dad's 60th birthday celebration!  It was in Savannah, and we had such a great time!  It was extra special because all of my parents' grandkids were there--all EIGHT of them, lol! 

Left to right: My hubby, me, my brother, my sister, my sister-in-love, my mom, and my dad

I was truly grateful to be there to celebrate my father's life, and the one who has offered me wisdom over the years.  We ate at a restaurant called The Crab Shack.  It was so good!  This is the part I tell you that I have a history of allergic reactions from unknown sources, so...it was grilled chicken for me.  But...it was the best chicken I have ever had!!  Also, the smashed taters were my favorite.  From what I gather from everyone else's choices (low country boil, crab, and shrimp), the seafood was good too.

Our second trip came shortly after returning from Savannah.  This time we headed to Shreveport, Louisiana for a celebration of my father-in-love.  He has been the mayor of a small town called Mansfield for 16 years, and he retired this year.  There were about 100 people in attendance--some flew in from other places in the country, and others drove, or had worked alongside the mayor for years.  

The theme of the event was a masquerade, and it was held in a banquet room alongside a restaurant.  All of the walls were adorned with gorgeous costume dresses, and masks decorated the tables for guests to wear.  It definitely had a New Orleans Mardi Gras feel, and the air was electric as my father-in-love walked in to everyone wearing masks, and excited to honor his contribution to the history of the town of Mansfield.

There were lots of beautiful speeches, and the food was AMAZING!  Etoufee, Catfish, Shrimp, and Potatoes all seasoned to perfection.  I forgot how wonderful authentic Cajun food tastes! I managed well with the Catfish and potatoes.  Also, in the middle of all of this celebrating, we had a special celebration of our own.  Our youngest son turned TWO!  So we did take the time to find an entertainment center where all three kids could run and play to their heart's abandon, lol!  Overall, it was a blessed time had by all.

The third and final trip for the month was to Charleston!  For this one I went by myself!  One of my best friends turned 40, and she decided she wanted to celebrate in one of the most beautiful cities in the South.  It was my second time visiting there, but this time I got to experience more of the history and culture of the place.  We attended some historical tours and churches, and visited the market (for handmade items, of course).  I ended up buying the most divine soap in a Gardenia fragrance, as well as Kombucha (gotta have good gut health).

After all the traveling was over, I bet you can guess where my sewing month of July went.  Yeah, it fell a little flat, but I do have TWO things to show you today.

The first thing I made was a "sort-of" request by the birthday girl herself.  We were hanging out and chatting a few months ago, and she casually mentioned how she LOVED the two kimonos I made for myself.  I told her to try them on, and once she did, we saw that they fit her perfectly.  I then asked her if she would even wear it if I made one.  Of course she would, she loves handmades!  Right then and there is when I decided what her birthday gift from me would be.

So, here she is in her lovely floral kimono:


This is New Look 6378, which I made twice before.  I used a gorgeous Rayon Challis from Fabric.com that you can find here.  The fabric is so soft, drapey, and smooth to the touch.  I chose it by online pic, but was even more impressed when I saw it in person. I may have had a fleeting thought to keep this fabric for myself, but I quickly put that to the side.  I made her version to the same specifications as the two I have already made so I won't go into further details in this post.  If you would like to read that review, see here.


The gift was well received, and I even got a request to make another one with a fabric of her choice!  

So, that brings me to my final make for July, my beloved Isla dress:


This is a Made by Rae pattern with a dress and top option that debuted on Creativebug  As soon as I saw the style of the dress, I just KNEW I was going to squeeze in time somewhere to make it.  I watched the instructional video one night, and realized I could assemble it without further assistance.

So, I downloaded the PDF, printed it out, cut a size S, and sewed it up with a 3/8" Forward shoulder adjustment only.  I have to say, the bodice looked SO SMALL.  I almost thought I should have graded out a little like I usually do, but the negative ease worked in my favor, and the fit is better than I imagined.

The fabric is a cotton/rayon knit in a striped navy/coral that I found at Walmart, of all places.  I have been able to pick up gems there every now and then, and slide it into my grocery shopping, lol.  When I was getting the fabric cut by the attendant, he looked at it and said "I can't look at this too long or it makes my eyes hurt."  Ha!  Well, I wonder if the final result is any better.


Anyhow, I am such a fan of the construction method used here.  It reminds me of Ottobre in that one shoulder seam is sewn, the neckline binding is attached, and then the other shoulder seam is sewn.  For the bodice, elastic thread is used, but since I didn't have any, I used clear elastic.  It creates the same shirring effect with little effort.

For this dress, as soon as I saw this Isla inspiration photo, I knew I wanted to achieve the same effect with the fabric I had:


Even though I don't play around with stripes often, I had so much fun making this dress!  I even decided to enter it into PatternReview's Polka Dots and Stripes contest.  There are so many amazing entries, and it was a goal of mine to enter a contest this year.  I finally did it!

So July turned out to have two sewn garments. In turning my attention to August, I plan on tying up all the lose ends that I can.  That means finishing up some of the garments on my Spring/Summer list, and re-visiting fit adjustments on things I have made, like my denim shorts.  I welcome the change of pace that will occur with my kids returning to school!  It has happened all too soon, yet I would like to have more blog posts for you all in the coming months.

I have some different projects I am thinking of doing, and I want to incoporate some fun elements into my sewing as well.  Here's to embracing the rest of this year and all it has to offer!


Stay sew-filled!