Don't mind me as I HAPPY dance today!

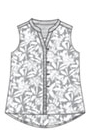
Ok, I promise not to ramble about how excited I am about this tunic. Instead, I will fill you in on the details by starting with the fabric I used. There is a small inspiration for it...You see when I made my youngest son his first vest, I used this cotton shirting and solid blue lining to come up with a winning combination:


A part of me wishes this vest still fit him because it was just the cutest! But since it doesn't, I thought I would revisit my leftover fabric from this project in a new way. And that is where the Kalle tunic came in! It is part of my Spring/Summer capsule, yet I didn't get to it until now. So my thoughts for this version was to use it as a muslin to work out the fit, and practice the new-to-me technique of constructing a popover placket. Suprisingly, it only took me one week to complete! That's a record--for me!


Placket Construction
So, now let's get into the construction elements! The one that sticks out with this version (View B) is the popover placket construction. It was my first one, and I will not lie, even with the pattern instructions AND tutorial on the Closet Case website, I just couldn't figure it out. I got quite a few steps in, but got a little lost when I pulled the placket to the right side of the shirt. Long story short, I found an excellent video resource by Professor Pincushion here. By watching her, I realized I was not turning the placket on itself correctly!! After that, the placket went in smoothly, and now I marvel at how amazing they look. It wasn't all that hard to do now that I know how to do it, lol!

Collar
When I started a shirt dress last summer (I still need to finish it), I got lots of practice with shirt collars. I remember that the method I used was the traditional way that involved hand sewing, which I don't mind because I actually love to hand sew. But this go round, I decided to try the Closet Case Method with (get this) no hand sewing. I'm sure it's not exclusively a Closet Case method, but THANK YOU to whoever created this innovative way of sewing a collar and collar band. The results are beautiful! The only downside is that the topstitching is done on the collar band from the inside of the shirt for accuracy. That means that the outer collar band doesn't look precise. But, since the collar folds over that part, who would ever know?? I really liked this method.
Also, I think my collar points turned out pretty sharp. I used a point turner, and a needle with a bit of thread to pull that edge out some. Heather has an amazing tutorial that shows how to sew a thread tail in as you are constructing the collar so you can use that for sharp points. You can see that here.


Here is where things gets a little hairy. Now I have done buttonholes many times before. I always do a test strip, then proceed to the actual garment. I did the same thing this time around. Except, when I got to my garment, I sewed ALL of my buttonholes on the WRONG side of the placket!!! I was so mortified, you all! Thankfully, I had not cut my buttonholes open, or I would have cried. Instead, I googled some tips on removing buttonhole stitches, and found one from Threads that worked amazingly. Basically, remove all of the bartacks from the wrong side of the garment first, and then remove the threads from the top. I know that sounds simple, but I can tell you that I was doing it totally wrong before I searched google.
With the tip from Threads, two things happened:
- The buttonhole stitches were VERY easy to remove
- Once the threads were removed, there was still a small noticeable blemish on the garment, but not enough to bother me. Just a note for anyone who finds themself in this predicament too.
Once I recovered from this mistake and put all my buttonholes on the right side of the placket, I learned the most wonderful fact--my sewing machine can sew buttons on for me!!! Seriously, I love to hand-sew, but why did I not ever know this??? A little bit of tinkering, and I was able to attach all my buttons smoothly. I share all of this to say---BRING ON THE BUTTONHOLES! :)
I never imagined that this whole process could be streamlined in this way, and I can't wait until I sew my next Kalle! Today's version has a lot of structure due to the fabric, but I have seen lots of great takes on this pattern in lovely fabrics with more drape. I think I will use a more fluid fabric for my next Kalle:

I am not sure of the fabric content for this lovely, but I know it was from Fabricmart Fabrics so I will look it up. I also got a little gung-ho and traced and cut out my sleeveless blouse from the Ottobre Woman issue this year. I hope to get to this one sometime this month too.
Tips that helped along the way
For this shirt, I used a Frixion pen for all of my marking. Bless you dear Frixion pen! It made this project easier to accomplish, and it worked wonders for topstitching. My topstitching has been known to go off a little bit, and following a marked line really helped. If you are not familiar with this pen, the mark disappears when you iron the fabric. *Be sure to test on a piece of scrap fabric first.
One of the tools Heather from Closet Case recommends is a glue stick. Bless you glue stick!! When sewing in tight spaces, you don't want pins getting in the way. So, for the bottom part of the placket, gluing it down worked so well. I will definitely keep this in mind for future garments.
Burrito Method
This pattern also uses the burrito method to sew together the front and back shirt and yoke. I am not going to go into this. I will only say that it is thoroughly explained, and I think most anyone could follow the instructions well.
Hem Facing
I love how the hem of this tunic is finished because it comes out so clean and pretty. You attach a strip of bias fabric to the edge, and it is turned inside and stitched. I had seen a review where someone said she loved the finish, but only wish she had added some width to her bias strip. I totally forgot this, and will do that next time. I needed a tad more room, but just made it work:

Overall, I really LOVE this tunic shirt! If you are in search of a great button up shirt, consider the Kalle!

It turned out so great!! I love that shirting; it will transition very nicely into fall.
ReplyDeleteThank you! I definitely love CC patterns. This shirt will go with me into Fall!
DeleteNice work, Vanessa! This is a very cute top, and I'm sure you will wear it a lot! :-)
ReplyDeleteThanks Patty! I am already planning to wear it again, lol!
DeleteThis is so very cute on you and a great fit!
ReplyDeleteThank you Ms. Faye! I was so nervous about the fit, and I must say it surprised me.
DeleteThat is so cute on you! I think it will look good this fall with a cardigan too!
ReplyDeleteThanks Diane! I think you are right!
DeleteVery cute tunic! I love your fabric and pattern choice, of course, that great hemline facing! Your works really inspire me.
ReplyDeleteThat is so nice Eli! You inspire me too!
DeleteThis looks great! I've seen so many Kalle dresses and tops and always felt kind of "meh" about the pattern; yours is honestly the first version that makes me want to sew one!
ReplyDeleteWhat?!? I made you want to sew a Kalle? That's awesome!
DeleteThis looks amazing! I love the fabric you used it works perfectly for the pattern. I’m sure you’ll get lots of wear out of this because not only does it look great but it also seems like a perfect every day garment.
ReplyDeleteYes, I agree! It is a wonderful casual garment, and I really want one for each day of the week, lol!
DeleteI'm so happy to hear your buttonhole saga turned out well! I too recently discovered sewing buttons on by machine, and it has changed my life :) Looks great, and I'm sure it will get a lot of wear!
ReplyDeleteThank you Chloe! Those buttonholes are a source of pride now. So glad your machine sews on buttons too!
DeleteFreaking lovely!! (New lurker here)
ReplyDeleteI’m still working on my muslin for the StyleArc Italia dress but my Kalle tunic is next in line and it is just lovely on ya! Yours turned out so sharp that I’m a bit excited to get on with it, now.
P.S. I hand sew all my buttonholes. I love hand sewing, it’s a zen thing, and it’s either do buttonholes in the evening in front of the TV or wasted my time on the iPad surfing the interwebs.
Hey Jypsea! I'll have to check out the Italia. I think you will love the Kalle! There is good reason to be excited about it! Best wishes on your garments, and I TOTALLY understand hand sewing!
ReplyDeleteI love this! I can see why you're so excited about it. It's such a lovely button down shirt pattern.
ReplyDeleteThank you! :)
DeleteIt's so beautiful, I really like your good idea, thank you for sharing.
ReplyDeletegifts for mom ideas
homemade gifts for dad from daughter
best new baby gifts