Today I am finally getting a chance to show you what I made over a month ago! Yes, my first pair of handmade skinny jeans are completed:

In April I decided that I would work on the Ginger jeans in my spare time, and see if I could get a fit I was happy with. It was a way of taking the pressure off of the whole process, and learning from what didn't work for previous versions. In all actuality, I think the drafting for this pattern helped to sway my results in the right direction! Some other things I did that were helpful:
- watched the Bluprint class Plus Size Pant Fitting with Kathleen Cheetham
- referenced Pants for Real People
- watched Sew Sew Live on YT for help with construction


This is what the website says about this pattern: "Our best-selling Ginger Jeans are now available in a universally flattering mid-rise cut! These jeans are the daily staple you’ll reach for again and again.
This PDF only jeans pattern includes a skinny and stovepipe leg option, both options featuring a tummy-slimming pocket stay. Hitting just below the belly button (about halfway between the low and high rise of the original Ginger Jeans), the Mid-Rise Ginger Jeans feature subtly shaped back pockets to highlight the curve of the bum, slimming side seams and a higher back rise to prevent peekabooty. Designed for stretch denim, Ginger Jeans will hug you in all the right places."
The version I chose to make is View B, the mid-rise with skinny legs. I cut a size 10 for the front, and graded to a 12 at the hips. For the back, I cut a size 12 throughout. My additional adjustments were as follows:
- 1/2" swayback adjustment
- 1 1/4" full seat adjustment (which changed my LIFE)
- 1/4" crotch lengthen
- 1/2" hyperextended calf
- scooped out the back curve
For fabric I used a stretch denim from my stash. It is slightly stretchy, probably 1-2% in a mid-weight.
My waist (30") and hip measurement (40") fell perfectly within a size 12, but for some reason, I have always had SO MUCH EXCESS at the center front when I followed my hip measurement. I saw in the Bluprint class that I could be smaller in those areas and need to size down, and grade out for my hips. That made total sense!
Anyhow, there is a method Kathleen Cheetham uses to help you measure your body and determine whether this is the right choice for you. I tried it, and it worked well for me. I can't wait to see if it is helpful for other pants I sew.
Construction
Much of the construction for these pants was easy. The only places I needed additional help was with the fly front. When I sewed the fly front on my first attempt, it just didn't sit right. The zipper was not positioned deep enough to allow for adequate closure of the pants. So, I took it out and restitched it with the assistance of the Sew Sew Live tutorial, and it was perfect! I mean she seriously makes it look easy peasy! If I had three fly fronts lined up to sew, I would have stitched them one after the other!

Back Pockets/Pocket Stay
These were so much fun!!!! I mean, the best part of jeans are creating the back pockets, right? I knew I wanted something with angles, so I began researching some designs for inspiration. During that search I found out that Closet Case has over 40 back pocket designs that you can download once you join their newsletter. I knew I had been a part of their newsletter for a long time, so I searched my email and found it (yes)!
After skimming through it, I was immediately struck by this one:
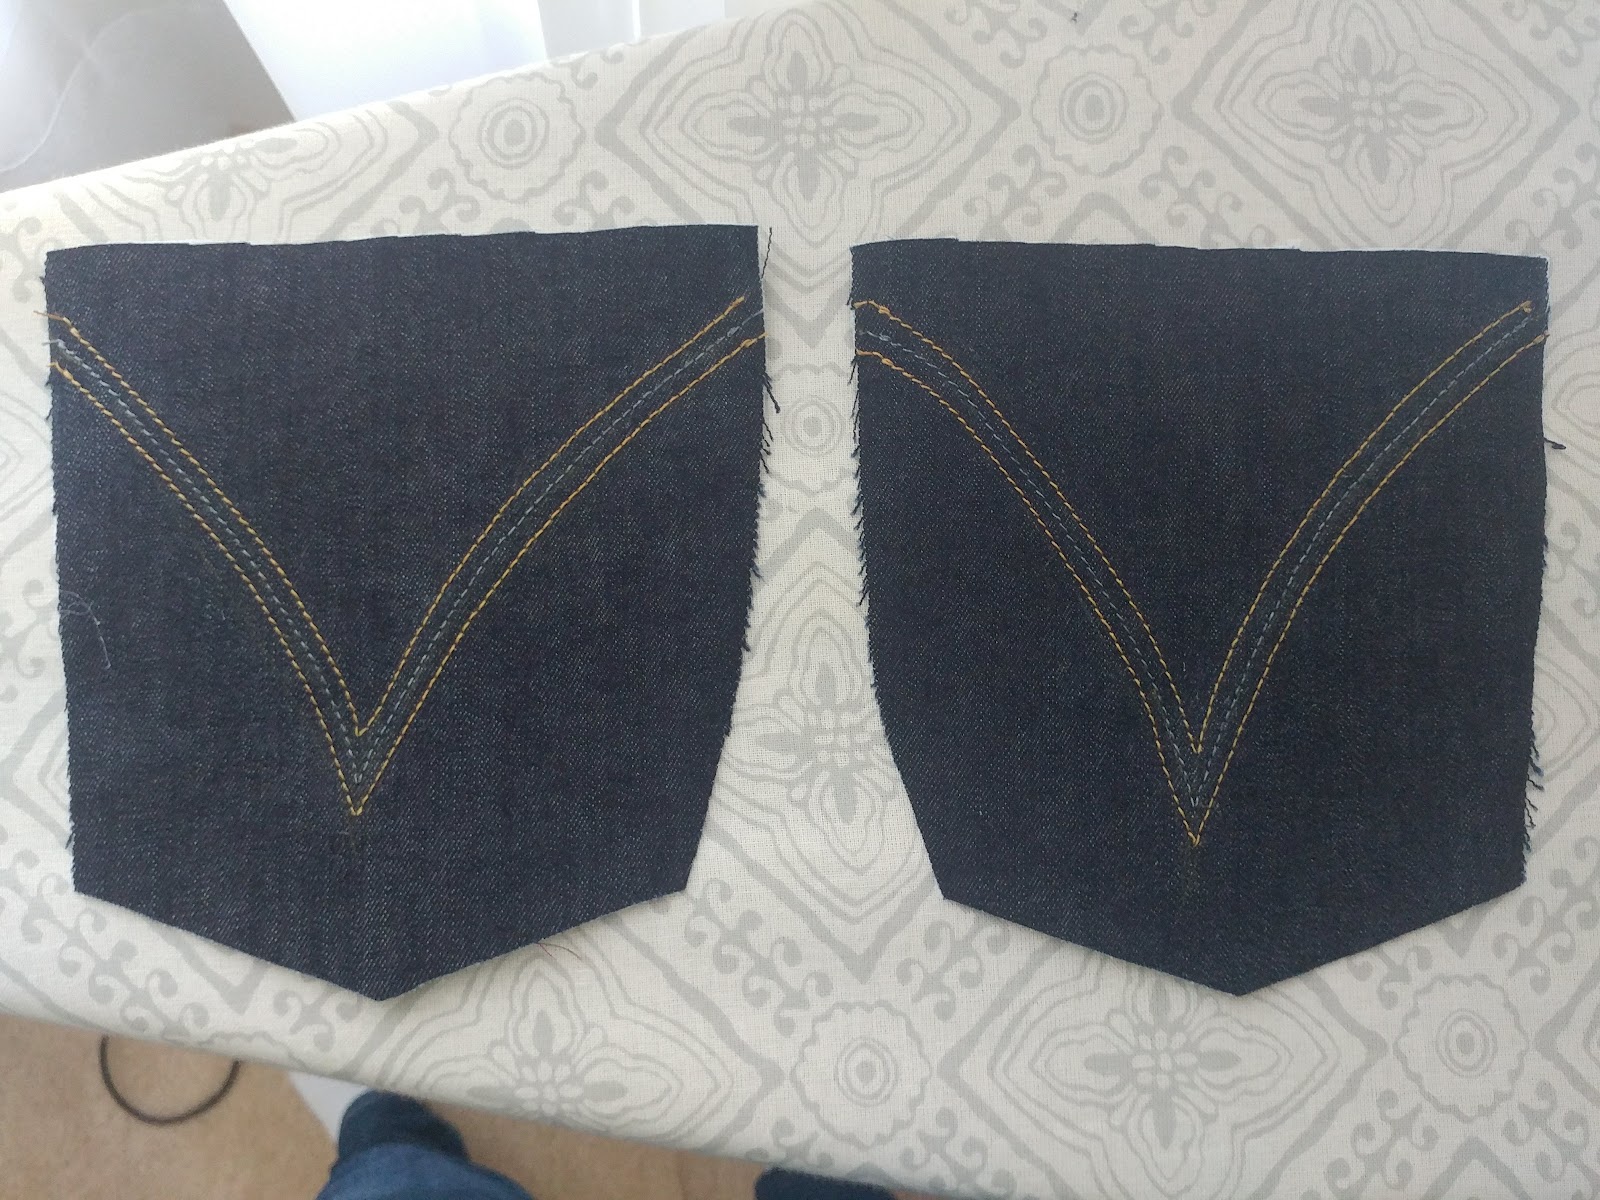
It was exactly what I was looking for! I liked the look of the "V," and cheesy enough, my name is Vanessa, so there you go! The pockets are transposed in the picture, but I really love the shaping of these. Once you sew them on, they look really nice.
A word about the back pockets, though. I basted mine on first and they were extremely low for my backside. I ended up moving them up about an inch, and they looked much better. If you are in doubt, check them out first before you commit and sew them on.

For the pocket stay, I decided to use some cotton sateen from my stash. It was leftover from the dress I wanted to make for my brother's wedding a few years ago, and I still very much loved it and thought it would be a nice sight when pulling on these jeans. I must say, I LOVE the pocket stay! I am not sure if it slims my tummy, but I love the fact that it does not hang freely, and is enclosed within the CF and waistband.

Flat-fell seams
For these jeans, you flat-fell your seams on the wrong side. However, you can flat fell the groin seam if you choose. I decided to go with the serged flat fell seam for the inside. I serged my seam edges first (with cut feature disabled), stitched my seams right sides together, then trimmed one side to 1/4" and pressed the other serged seam over the cut edge. You can read about it here.
Topstitching
I admit I wasn't nervous about most of the topstitching, only about getting the fly front curve right, and the bartacked areas, since I have to put those settings in my machine myself. I practiced the topstitching on scraps, and find that visualizing a specific spot on my presser foot, and keeping that spot lined up helped the most.
There is also a fly front guide that works beautifully. I traced my stitch lines onto my jeans with chalk, and had no issues. If you have never made jeans before, you will use LOTS of topstitching thread. LOTS! The best tip I read from the pattern (there are many of them) is to use topstitching thread on the top, and regular thread for your bobbin. Why, of course!! I didn't think of that before, even when I made pants in the past. It significantly decreases how much topstitching thread you need, but it also makes your thread changes a lot faster since you are only switching out the thread for the needle.
Waistband
The waistband is constructed by a front and back piece. There is a slight curve to the band, but due to my swayback, I had to cut some darts on the pattern piece to create a more curved piece (see here). There is also additional length to the waistband so that you have what you need to line up the edges at CF.
I will say that my machine had a lot of issues while topstitching the waistband, due to all the layers of denim. There are some snarled threads on the underside, but that's ok. I re-tried it a couple of times, and even changed my needle/tension, but it still did it, so I left it well alone. For the buttonhole, I had to change to regular thread, which I matched as best I could. I think I will just use regular thread on my next pair (of course there will be more).
Pattern Adjustments/final fitting
It's been a while so I can't quite remember the order of construction I went through. However, I do know that I followed the pattern instructions to baste for fit. After I made all the modifications, I took out the basting stitches and did the final stitching. I think the front and back were fully assembled and topstitched at this point, so it is not as extensive as it sounds.

I also used a pair of RTW jeans (on the right above) from my closet to create the shape I wanted for my skinny jeans. These were an Old Navy pair I bought years ago. They fit well, but had faded quite a bunch. The Ginger jeans still had quite a bit of excess fabric I could remove to get a better shape. Here is what my pattern looked like after I transferred the changes:

The green marker is where I removed additional fabric. I have left the pattern intact in case I use a denim with less stretch in the future. I can always adjust, but those lines are a guide for where I like the shaping to occur.
Finishing
Thankfully I purchased the Ginger Jeans kit last year when I got the pattern. It has all the rivets, needles, and buttons you need to add those finishing touches to your pants. You can definitely individually source the items, but I have a soft spot for reasonably priced kits that make it easy.
Installing the rivets were not a problem, but I had to limit the amount I used because I just could not set them in some of the bulkier areas. I placed them on the front, but left off the rest for the back. I will try again with a lighter weight denim.


I can gladly say that the final result of these jeans fits me MUCH better than my RTW pair! But that is probably because my butt has room, and my jeans don't gap!
Speaking of the next pair, I will probably adjust the rise slightly. Right now they feel more high-waisted than mid-rise, so I will decrease that some. Other than that, I LOVE THESE!!!!!!!!!!

Stay sew-filled!
You did an amazing job. These jeans look great. They are so neatly done and very professional looking. I have this pattern but have not taken the plunge yet. I clicked on the Sew Sew Live link above, but it didn't open. I'm not sure if it was just me or maybe their site is down. Thank you for sharing. I really appreciated reading the detailed review.
ReplyDeleteThank you! I just fixed the link--sorry about that! I hope you get a chance to make them!! I am sad that I waited so long to start mine. It really is a pattern that lives up to all the hype.
DeleteGreat results, Vanessa! Thanks for such a detailed explanation of your process....
ReplyDeleteYour welcome! I wasn't sure if I would remember everything since it has been a minute since I finished them, but a lot came back to me. :)
DeleteAmazing! The ginger jeans are such a great pattern. I love the pockets!
ReplyDeleteThey ARE!!!! I know I am partial to Closet Case patterns, but I really like this one!
DeleteThose look so professional! I also really love your top- did you make it too?
ReplyDeleteThanks Ann!! My family saw me making them, and still couldn't believe I made them when I finished, lol! I think all the details add up nicely. For the top, it is a gift from my Mom. A.n.a. at JCPenneys, and I have it in mind to hack it because I love it so much!
ReplyDeleteGreat fitting jeans. Love your work details and well done on making these ❤
ReplyDeleteThank you Hana!
DeleteWow! Those are a great pair of jeans and you got the fit down! I want a pair now too! You did an excellent job!
ReplyDeleteThanks Lesley! I look forward to remaking these since the fit is worked out! If my shorts on my module don't work out, I will definitely revisit these!
DeleteYay!! Your jeans are great and fit perfectly!
ReplyDeleteThank you lady L!
DeleteVanessa, what a great job you did with these jeans! Thank you for sharing very helpful information about the fitting process you used. I need to go to Bluprint and check out that information. They look great on you! I am glad you raised the back pockets as I have seen other Ginger jeans and pockets appeared too low!
ReplyDeleteThanks Linda! Sewing pants that fit is still new to me, yet I will gladly share anything I think will help others. Bluprint has been phenomenal at helping me understand fit changes I needed. So so helpful!
DeleteThese look fantastic! Excellent job.
ReplyDeleteThank you Natasha!
DeleteThank you!
ReplyDeleteVanessa, your jeans looks like RTW. The fit is awesome. I've not been sewing clothes for quite a while, but the charity work keeps me very busy. I did make a couple of things for my daughter, but for some reason I don't receive pictures.
ReplyDeleteThank you! It is good that you are still sewing, and charity work is always important!
Delete