Here is how it came out:
I followed the instructions to the tutorial for the Baby Lattice Quilt by Amy Smart to a "T," and my only
hiccup was sewing the binding (which I am still learning to do well). Originally, I was quite concerned that this quilt was above my skill level, but decided to press on and give it a try anyway after I received an encouraging email from Amy. I just want to say that Amy was right! I maintained strict 1/4" seam allowances, and made sure everything lined up, and the rest fell into place.
The best part about sewing all the squares, triangles, and rectangles together is that I was only sewing straight lines. So, I think a beginner sewist with a basic knowledge of sewing could attempt this quilt with good results.
My only advice on things to consider with this quilt (or probably any quilt), is the binding application, and sewing all three layers of fabric together.
For the binding, I tried to do it Amy Smart's way, but I still had difficulty. So I found this super tutorial on Youtube (sorry, I tried to find the link with no success) that simplified the whole process, and gave me super results.
Now sewing the three layers of fabric together was a bit more of a challenge and frustration. You can see the quilt top pictured, but you also have a second layer of batting, and a third layer of backing fabric. I laid all three of these layers out and used safety pins to keep the layers from shifting, but I still had to be careful that the quilt wouldn't shift as I stitched the layers together because I didn't have much room at my sewing machine. I ended up rolling up one end of the quilt as tight as I could, securing it, and then fitting the quilt under my presser foot.
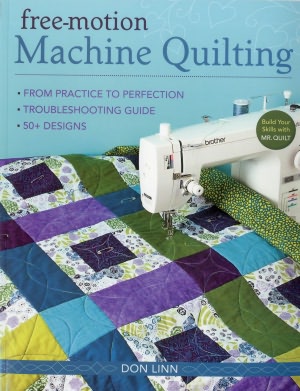
As I sewed, I made sure to keep my hands securely on both sides of the presser foot to keep any further shifting from taking place. It was a whole ordeal in itself, but it worked! I learned this method through this book after I sewed three seams incorrectly and had to rip them out (I was near tears at that point):
Other than those issues, I think the quilt came out fine, and I will definitely make another quilt in the near future.
When my friend opened her gift there were a lot of "oohs" and "aahs," and that was neat. The colors I chose go with the baby room, and she was impressed that I sewed the quilt myself. Everyone else at the shower had known that I was working on this quilt, so they were in on the surprise that it was handmade. All things considered, why shouldn't a special baby have a special item? This quilt I made is as unique as my friend's dear baby girl will be! I am so glad for the opportunity to use my talent in this way.
Here is one more picture of me sitting on the quilt. It ended up measuring 38 x 48":
Do I look tired? Because I had spent that ENTIRE day working on that quilt!
Oh, but it was soooo worth it!!
Thanks for reading about my experience sewing my first quilt, I appreciate each and every one of you. For the month of May I will finally be doing some sewing for myself for a change! I am in need of a few good garments, and I will be showing you my plan for those things on Thursday.
Stay sew-filled!!

Vanessa, how beautiful! Great job on your quilt. I'm intrigued now and may want to try one in the futre. Did you find it as enjoyable as garment sewing?
ReplyDeleteYour quilt is FANTASTIC! Great job!!
ReplyDeleteI know, for me, the baby quilts I received for my baby shower were the most treasured gifts. Beautiful job!
ReplyDelete