Monday, February 22, 2021

Itch to Stitch Bainbridge Pullover

 Hello everyone!

I am over the moon excited to be sharing a new pattern release with you today!  I have been a fan of the Itch to Stitch pattern company since I sewed the Uvita top a year or so ago.  I thought it was a great pattern to gauge the way the pattern fit on me, and as a free download, who could ask for more?  Well, just recently I saw a public testing call for the Itch to Stitch Bainbridge pullover.  As you may know, I have been in a relaxed and easygoing mode here lately.  When I sewed the Sew News Palmer Pullover I fell in love with the comfort and style of the garment, and appreciated that I didn't have anything else like it in my wardrobe.  The Bainbridge pullover looked like an opportunity to add more items in this category; so, I applied to test the ITS pattern, and was pleased when I found out I was accepted!

This pattern is fabulous!

The line drawing alone drew me in...


It has a half front placket with snaps, stand-up collar, bias-bound hem and sleeve hem.  I am always intrigued when you do not have to do a traditional hem.  That is one of the reasons I like the Sewaholic Renfrew, and sew it every year.  Other positive notes to this pattern include cup sizes, bust darts for shaping, and POCKETS! 

Now that you know the description, let me tell you how I did with this pattern.

Can I tell you I am now in love with cup sizes??  This was my first time using them, and my measurements put me in the A cup category.  So I made a size 4A with no grading.  I figured the ease in the pattern would cover my waist measurement sufficiently, and it did.  My only other adjustments were my normal 1" lengthening of bodice/placket, 1/4" forward shoulder adjustment, and 1/2" lowered bust point.


The instructions were wonderful!  There were two techniques I especially loved.  For the binding, you start with the RIGHT side of the tape pinned to the WRONG side of the fabric.  Then, when you stitch it and fold the tape over to the RIGHT side, you simply edgestitch it and you are done.  It is great because you don't have to blindly catch the underside, and the seen portion comes out beautifully due to the stitching.  This is going to be my preferred method!


My second favorite method was the pocket construction for the front.  Kennis Wong (ITS creator) has you use the seam allowance to attach the pockets, and they are then stitched down and closed off with the bias bound hem.  So nice!!!!


The fabric I used is a Microfleece in a burgundy color from Joann Fabrics.  For the contrast I used cotton plaid because I wanted to make my own bias binding.  You can certainly purchase your binding if you like.  Microfleece is quickly becoming an absolute favorite of mine! It sews beautifully, has some structure, but also enough minimal stretch in it to comfortably fall on your body.  Other recommended fabrics include Sherpa, sweatshirting, and any medium weight stretch woven.  There were so many lovely versions made by other testers, and you can check them out by visiting the Itch to Stitch blog.

I styled the top with my beloved Ginger jeans--the second pair I ever made. They are now very loved and worn in. 


For the snaps I used Snapsource size 16 in Antique Brass.  I already had the adapter to install the snaps since I have sewn baby clothes for friends in the past, and I was looking forward to using the tool for an "adult" project, lol!  I forgot how EASY they are to install, and now I want more reasons to put snaps on all the things!

Overall, I can't say enough good things about this top! It feels really good on, and I am grateful for the opportunity to test for Itch to Stitch.  I can say that there will be more testing involved with them in the future (woo hoo), and I have now fully converted to team Itch to Stitch by purchasing the Castillo cardigan to sew for Spring. 

Stay sew filled!


Thursday, February 11, 2021

Love Notions Oakley Vest

 Hello everyone!

Today I am back with an item I finished in January--the Love Notions Oakley vest.  I wanted to compile everything I sewed for the month in a post, but I just didn't have the heart to do it. So, I am posting things here and there with the hopes of having some garments to share for February.

Now, on to the Love Notions Oakley vest!

This vest has been on my list for many years.  I kept missing the "window of opportunity" to sew and wear it, so I would push it to the following year.  Once this year started I got into a rhythm of sewing vests, and this style popped into my queue immediately. I am so glad it did!


 Love Notions is quickly becoming a favorite Indie pattern company of mine.  I have found quite a few gems in their line, and I am sure there are still more to discover.  This particular vest pattern has three different views.  I made View B with patch pockets and collar.  There is also an option for a hood.  I would love to revisit this one for View A, a fully lined open vest designed for textured fabrics like faux furs.  


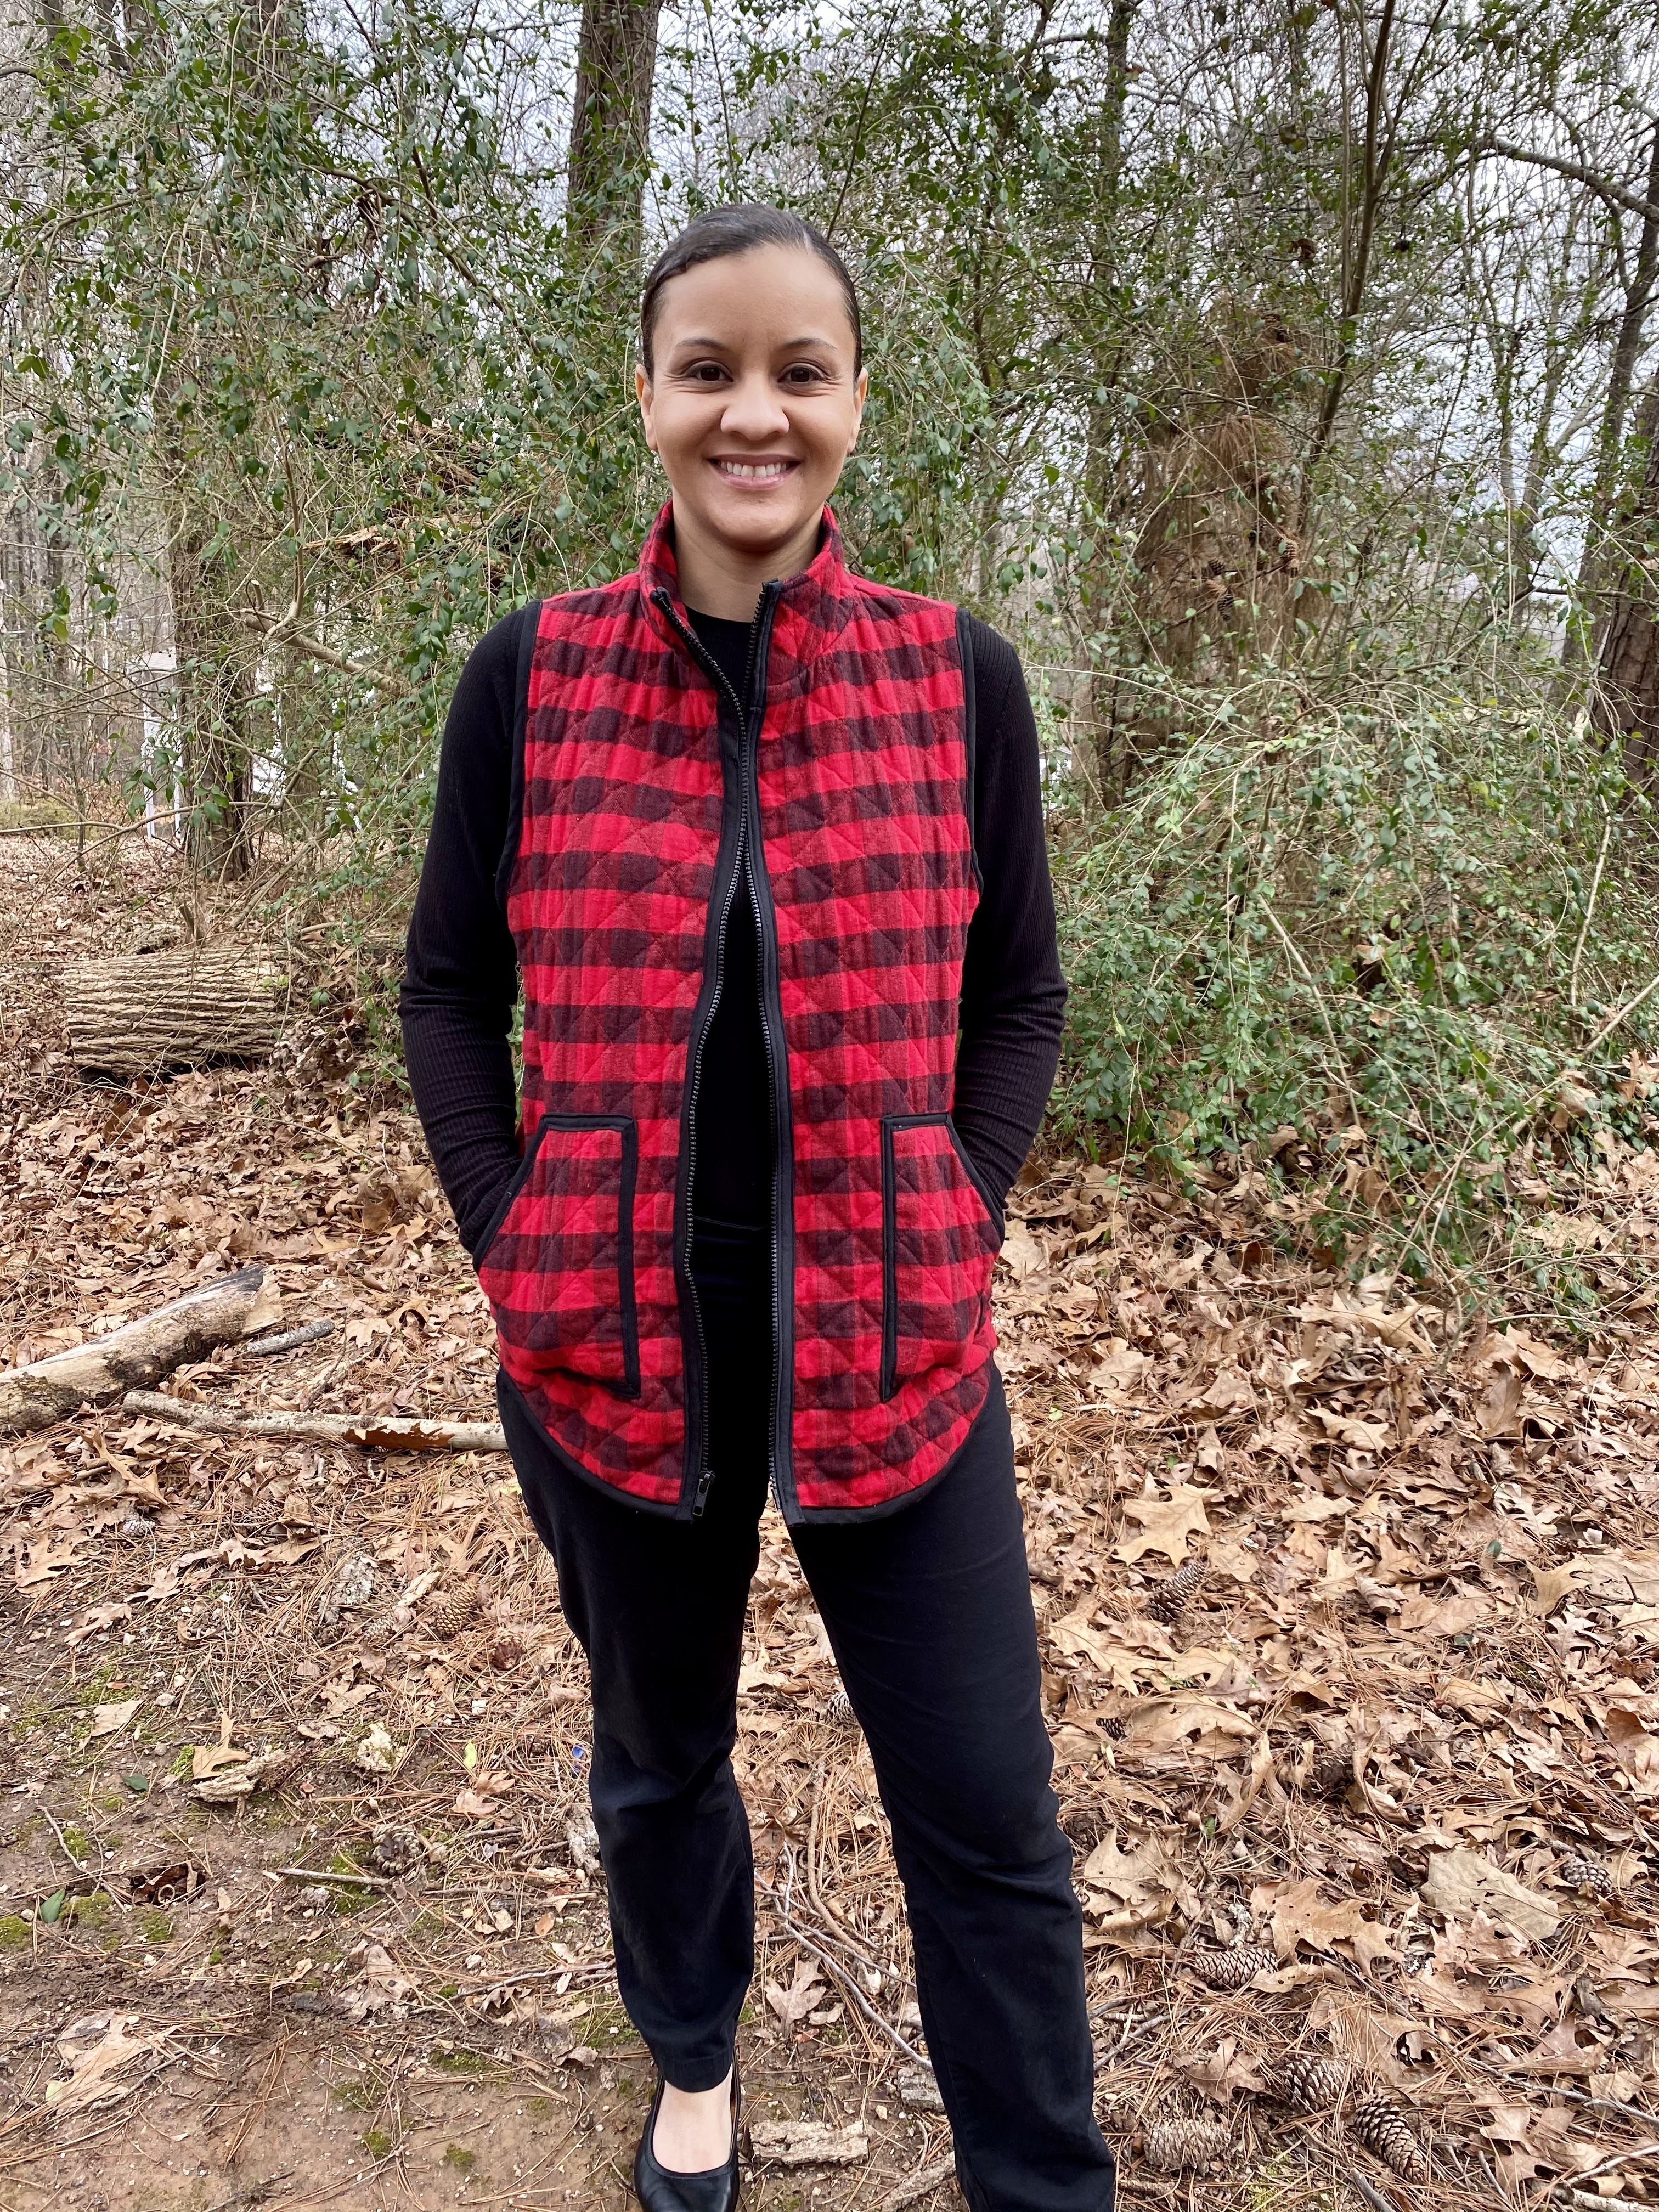
I made a size Small graded to Medium, and added my normal 1" for a longer torso.  The fabric is from Joanns, a quilted knit in red and black.  The stretch for this fabric is minimal, and the reverse side is a lovely quilted gray.  It is sturdy enough for this pattern, with just enough shaping for a comfortable fit.  While I was in Joann's the other day I noticed they have an entire line of beautiful quilted fabric in both solids and prints.  I highly recommend it for projects like these!

One of the things I loved was the binding of the patch pockets.  While this is a relatively simple pattern with only a few pieces, the bias binding was where all the real work was for me! I mean, come on!! LOL!  It is not hard to apply, only finicky. I purchased 1/2" double fold bias binding for this project in black, and it worked wonders. The only tricky part was navigating corners, but I found an amazing Youtube video that made it all clear.


Working with the plaid check also took a bit more time and attention on my part.  I have wanted to venture out with plaids, and have even started watching some Craftsy tutorials in order to continue to become more proficient in this area.  I am happy with how everything lined up at center front and side seams for this one!

A little trick I learned in the Craftsy class came in handy while cutting out the collar.  I originally tried to match it to the garment but kept running into issues.  I didn't have much fabric left (always buy more for plaids, ALWAYS), so I changed the orientation of the collar piece so that it was on the bias. I think it adds a nice detail to the collar, which I also ended up interfacing for stability.


For the zipper insertion I used a 27" plastic jacket zipper that I purchased from Wawak.  If you make the pattern as is, you would only need a 26" zipper, or less.  I wanted my zipper to come all the way up the vest because I planned on zipping it all the way up sometimes so 27" ended up being the perfect length for that.

The zipper is the last thing to be attached in the pattern, since all of the edges are bound at this point.  

I did tweak the fit of the shoulder seams and armholes a tiny bit.  When I tried the vest on, it was just a touch too long, so I trimmed off 1/4" before I applied the binding.  Other than that, this vest was worth all of the finagling I did to finish it!


I really appreciate the gentle curve of the hem, and I am wearing it with a black ribbed knit top made from Kwik Sew 3766.  Overall, I am so pleased with this pattern!  

Stay sew filled!


Tuesday, January 19, 2021

Sew News Palmer Pullover


Hello everyone!

I am so excited to be back with a review of my FIRST finished garment of 2021!  

I wasn't sure what direction I was going to be going in when the year started.  I usually have a clear vision and plan, but this year I have left a lot of things open for me to jump into.  So, when I discovered the Sew News Palmer Pullover Sew Along, I knew it was something I wanted to try right off the bat.

I couldn't find a line drawing to reference, but here is the description from the Sewalong:

 "Sewn up in fleece or French terry, the Palmer Pullover hoodie is cozy, chic and sized to fit both men and women. Stitch one in solid or with tonal color blocking; pattern pieces for both options are provided. The design also features an easy-access contrast zipper and placket, a split hem seam finish, optional kangaroo pocket and your choice of a collar or hooded variation. A roomy design means it works for both men and women."


I loved the colorblocking of the top, the zipper, and the hood.  It looked so easy and relaxing to wear--something for lounging around the house, or running errands too.  My finished version did not disappoint:


I chose a fleece from Joann Fabrics a couple of months ago when they had their HUGE fleece sale.  I bought some in black, black plaid, pink, and pink plaid.  I already had plans for the pink plaid (I hope to show you soon), but I still had the black sitting in my closet.  When I read that it was one of the recommended fabric choices, I knew right away I would use it.

I made a size S, graded to M, and while the overall ease works wonderfully, I could have used more room for the hood.  I guess my head is bigger than I thought, and while my hood is aesthetically pleasing, I cannot fit it over my head, lol!  If I make this again, I will definitely add more width to accommodate my noggin.  There is some stretch perpendicular to the selvedge (2 way stretch fabric), but not enough to create a nice fit.  Keep this in mind if you choose the hood version.

Let me talk a bit about the sew along.  It runs up until 2/01/21.  So, you can download the pattern for FREE and follow along with the video links.  There are five lessons that average about 7-8 minutes each.  That means not every single step is included in the video footage, but there is enough to follow along with, and you can always refer to the instructions if you are a total beginner.  

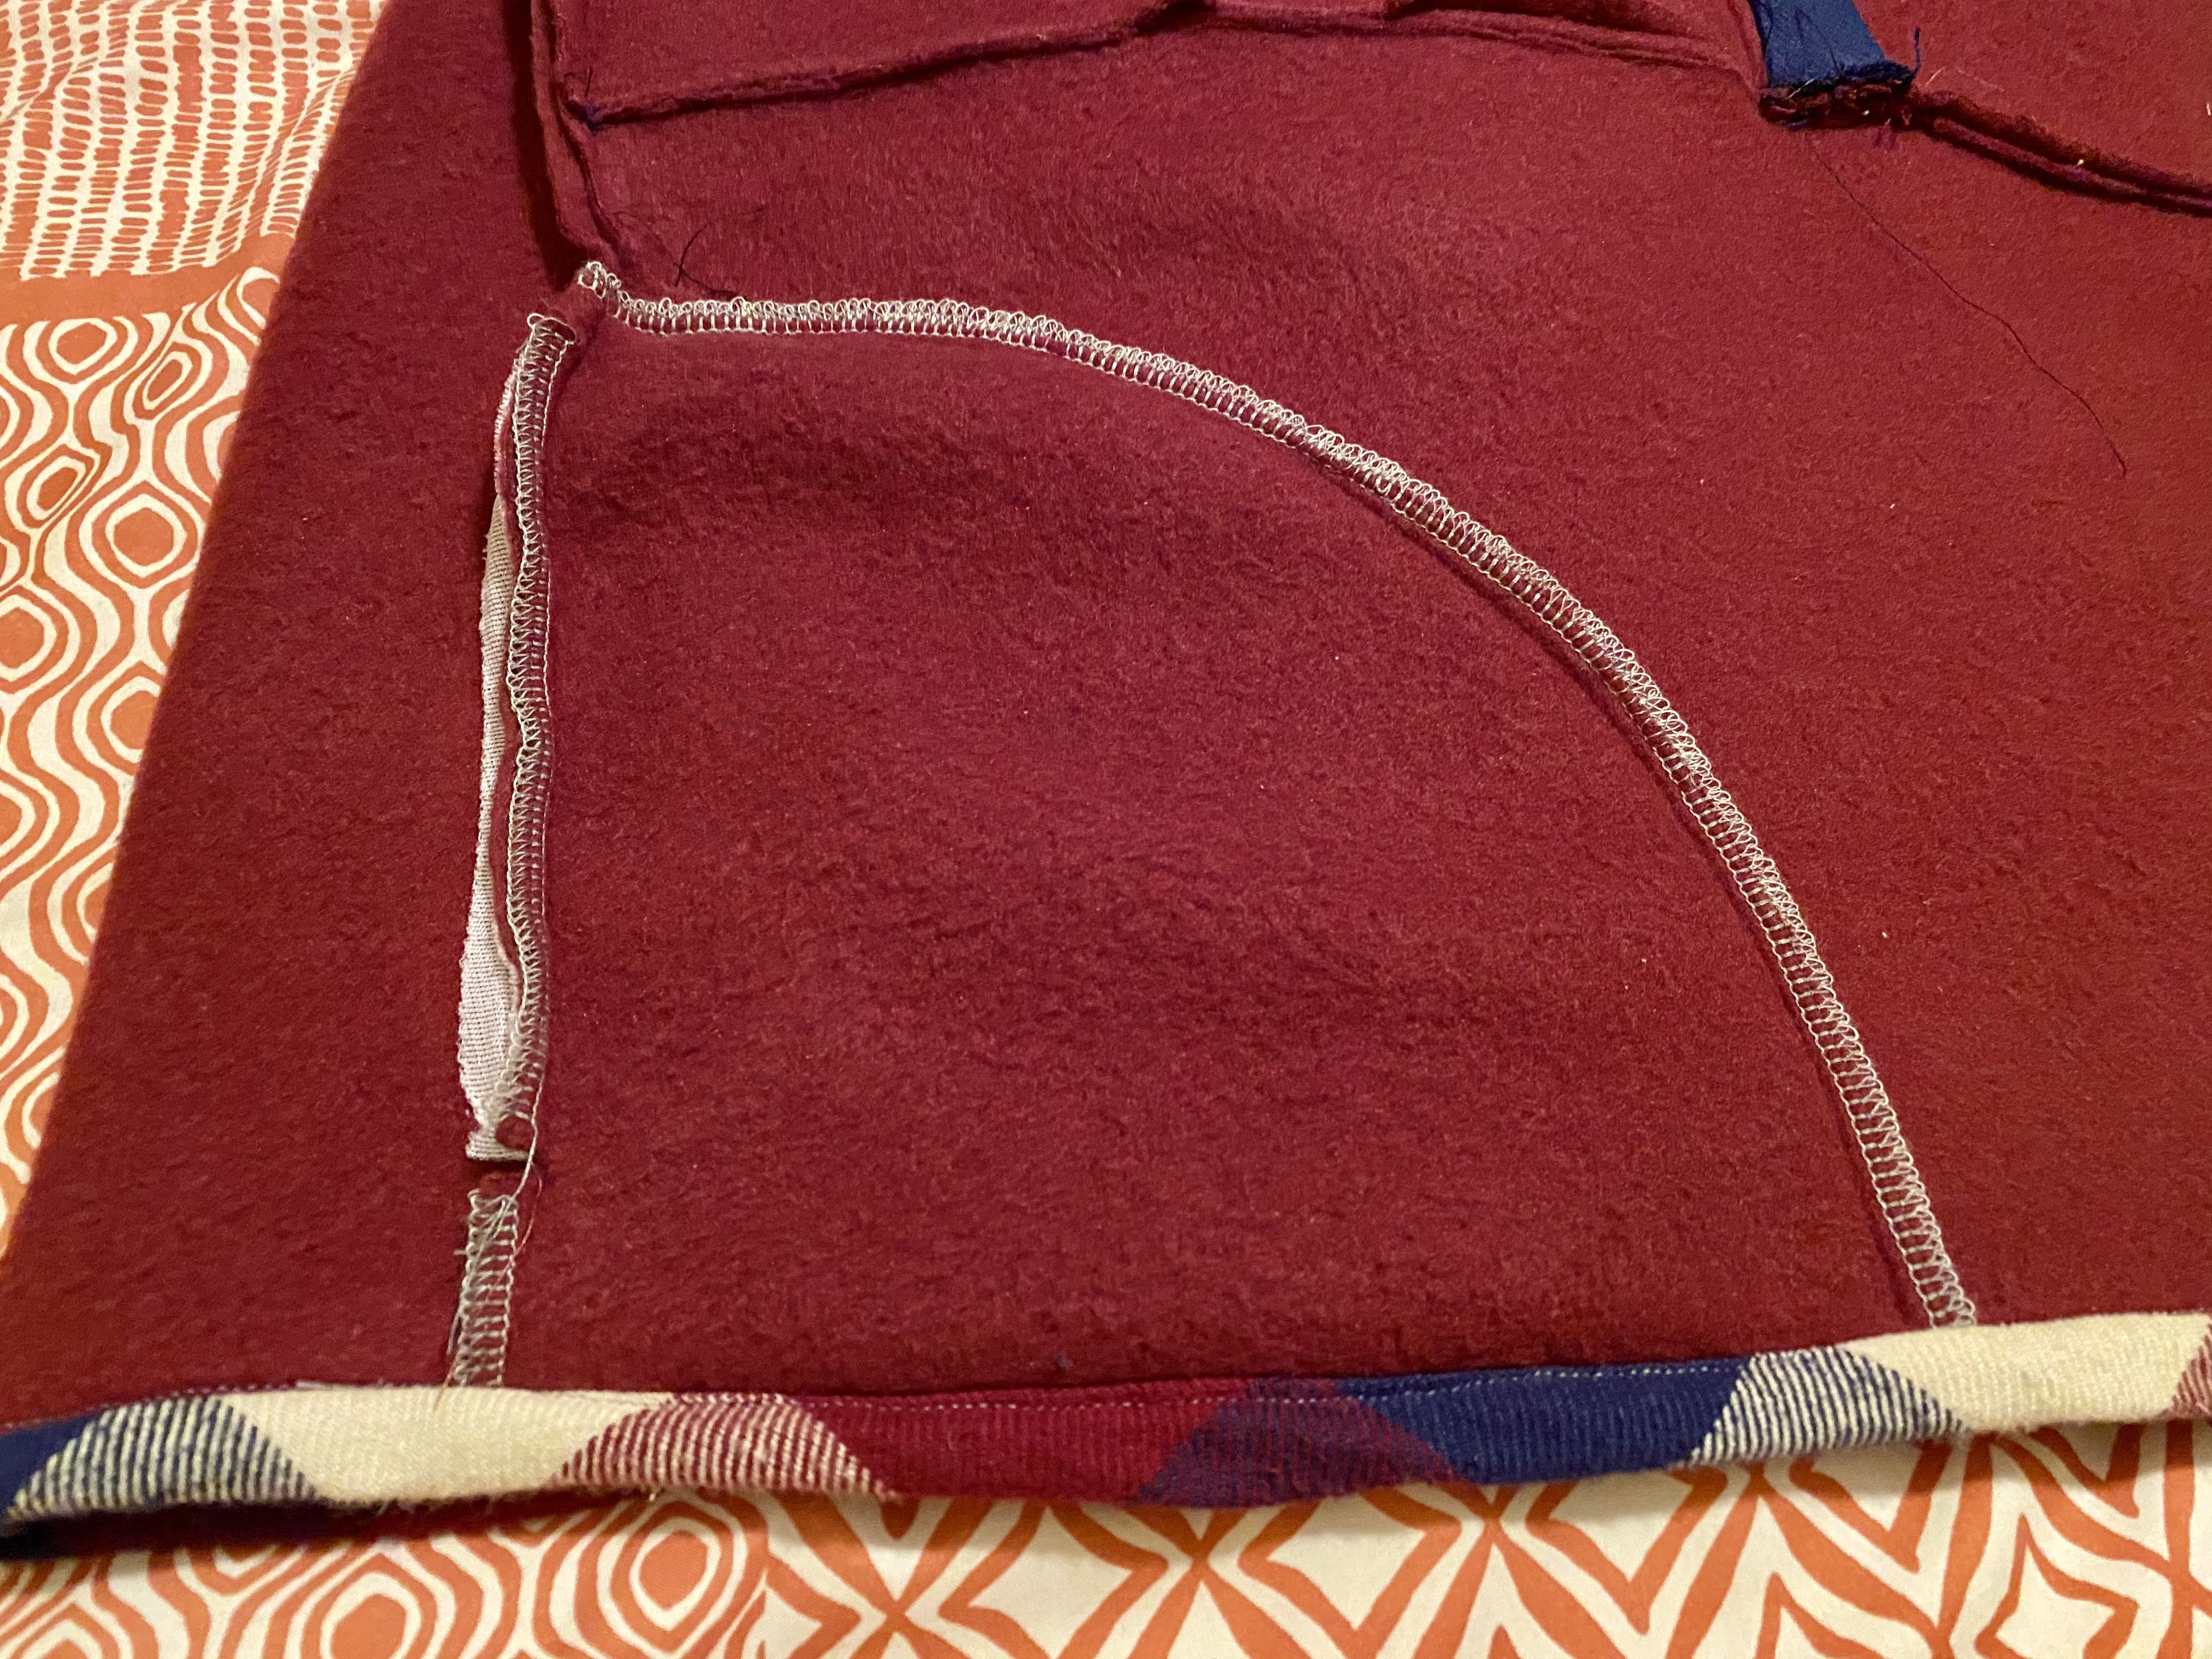
For example, there is not detailed information on how the instructor constructed the facing that goes over the placket on the inside of the pullover.  It is not difficult, but this was an area I looked back at the instructions to double-check before I moved on.  The overall construction is BEAUTIFUL!  I really love nice insides, and this pullover is one of those you would feel good about wearing inside out, lol!! I always strive to create a nice inside, but let's be real, sometimes I just want to finish and end up with bright white serger thread inside a dark blue garment (yep, I did that recently).  But this type of construction made me smile:


For the placket facing on the inside of the garment, it gets attached via the shoulder seam.  You then have the option to topstitch the facing by following the guide of an included pattern piece.  I went back and forth about whether or not I wanted to topstitch it down, but decided to go for it in the end.  I love it so much!! It just makes it look a bit more professional, and it keeps that facing in place, which is 100% what I wanted, and what I hate about facings sometime (slippage and flippage).


So you can see the way it all comes together nicely.  Now, a word about the plaid fleece I used...Originally, I wanted the upper portion of the sleeve to be plaid as well.  I had this vision of it in my head, so I watched a few videos about plaid matching and thought "Sure, I can do this!"  The side seams match fine, but I could not get the sleeves to look decent enough, and I didn't have any more fabric left to try!!!  Since I wasn't going to purchase more fabric, I created a make it work moment and used the extra black fleece I had instead.  I will re-visit plaid matching more this year as I grow a bit more.  I am pretty pleased about what I did accomplish, though.

Additional info about this pattern:
  • there is an optional kangaroo pocket (Woo hoo!!)
  • You can choose from a colorblocked sleeve or a regular sleeve
  • there is also a collar version
  • I think a version in French Terry would be pretty
For the zipper insertion, there was a tape method introduced that I tried successfully.  That is one thing I love about video instruction--you get to see different methods for achieving results.  I have never heard of using tape, but tried it and was pleased.  It is good to see what is out there so that you can personally decide your go-to for different skills.

Overall, this is a great sewalong, and a WONDERFUL pattern that I can see sewing again.  In fact I have already worn this top twice! It is an easy closet go-to.  If you are interested, check out the Sew News Sewalong to sign up before it ends (2/01/21).  I have no affiliation with them, I am just happy to have participated!

Links to fabrics I used (if you are curious):*
*I am going to try linking fabrics I use where I can, though I sew mainly from my stash, so I cannot promise I will remember each time.


Stay sew-filled!


Friday, January 1, 2021

Welcome to 2021!

 Hello everyone!

Happy New Year to you all!

I didn't mean for SIX months to go by without a peep here on my blog, yet a lot of things fell by the wayside as I journeyed through the ups and downs of last year.  For me, I experienced a definite shaking of my world, routine, family, job, emotions, etc. like everyone else.  I decided to put my focus on maintaining my health, well-being, and sanity.  That looked like a lot of prayer, Bible reading, and personal reflection.  It is what sustained me during a lot of the crazyness of the year.  And it is what continues to give me peace even now.  

I also got a promotion at my part-time job that required A LOT more time and involvement from me.  I did not anticipate all the work that this new role would entail, and between all of these things, I decided to take a break from blogging.  In October I tested positive for COVID due to an exposure at the preschool I work at.  It started as a stuffy nose and congestion, then progressed to pretty much all of the symptoms listed for the virus (loss of taste, nausea, extreme drowsiness).  The only symptom I didn't have was a fever.  I proceeded to quarantine, yet had already exposed my family unknowingly for two days, and they all developed symptoms too.  Thankfully, we all made it through, recovered well, and only had a lingering cough at night for about a month.

In terms of sewing, I have continued to sew because it is what I love to do.  I did not complete my Make Nine Outerwear challenge for last year, but it is still an aspirational goal that I would like to continue.  I have made a lot of garments for my wardrobe, and am really learning to coordinate colors in ways that I will use and wear them.  I have actually finished two or three capsules in the time I have been away; however, I did decide to break my RTW fast when I started working.  I bought some dress slacks for work because I didn't have the time to finish some, and felt like it was worth it to avoid stressing myself out.  Since then I realize I still like the pants I make better (LOL), and have continued to work at sewing pants.  I have used my trusty Ginger jeans pattern to sew three more pairs!! I love that pattern!!

Turning to my goals for 2021, I have decided to take the year to participate in different sewing challenges and sewalongs.  Because I usually plan a lot for years in the past, it has been a stretch to participate in the various sewalongs that come up without putting a lot of undue pressure on myself, or abandoning my own personal goals.  This year I want to leave myself free for what pops up, while also hoping to connect more with the sewing community.  At the end of December I started doing some research on year-long sewalongs to follow, and didn't come up with any.  So, I am open to what comes! If you know of any great sewalongs to share, please let me know.  In the meantime, I will be popping on to share things I have made for each month.

As crafting continues to surge, I hope you are finding ways to make time for handmades.  A little time here, and a little time there adds up and brings so much joy in the process.  Here's to a year of hopefulness, and a space for mindful making!

Stay sew-filled!