Wednesday, June 17, 2020

Change of Plans

Hello everyone!

In my last post I walked you through a sewalong of the Rhapsody blouse, which I am absolutely loving!  I have already worn it and it is such a nice style:


After I finished this blouse, I immediately turned to the Seamwork Willis shirt, thinking I would finish it in time for the Faye's Tops that Pop challenge.  Well, sometimes things get turned around for good reason.  I soon found out that the challenge was postponed, and though I pushed through and finished a wearable muslin for the Willis, it just needed SO much more fitting than I wanted to invest.


In thinking about my issues with the fit, I realized that I usually make a lot of changes to Seamwork patterns in order to make them fit.  I find this particularly true with their woven patterns, but not so much with knits.  At any rate, I decided to move on for now and re-visit this top at a later date.  Since I still wanted a button front top, I decided to make the Kalle tunic instead:


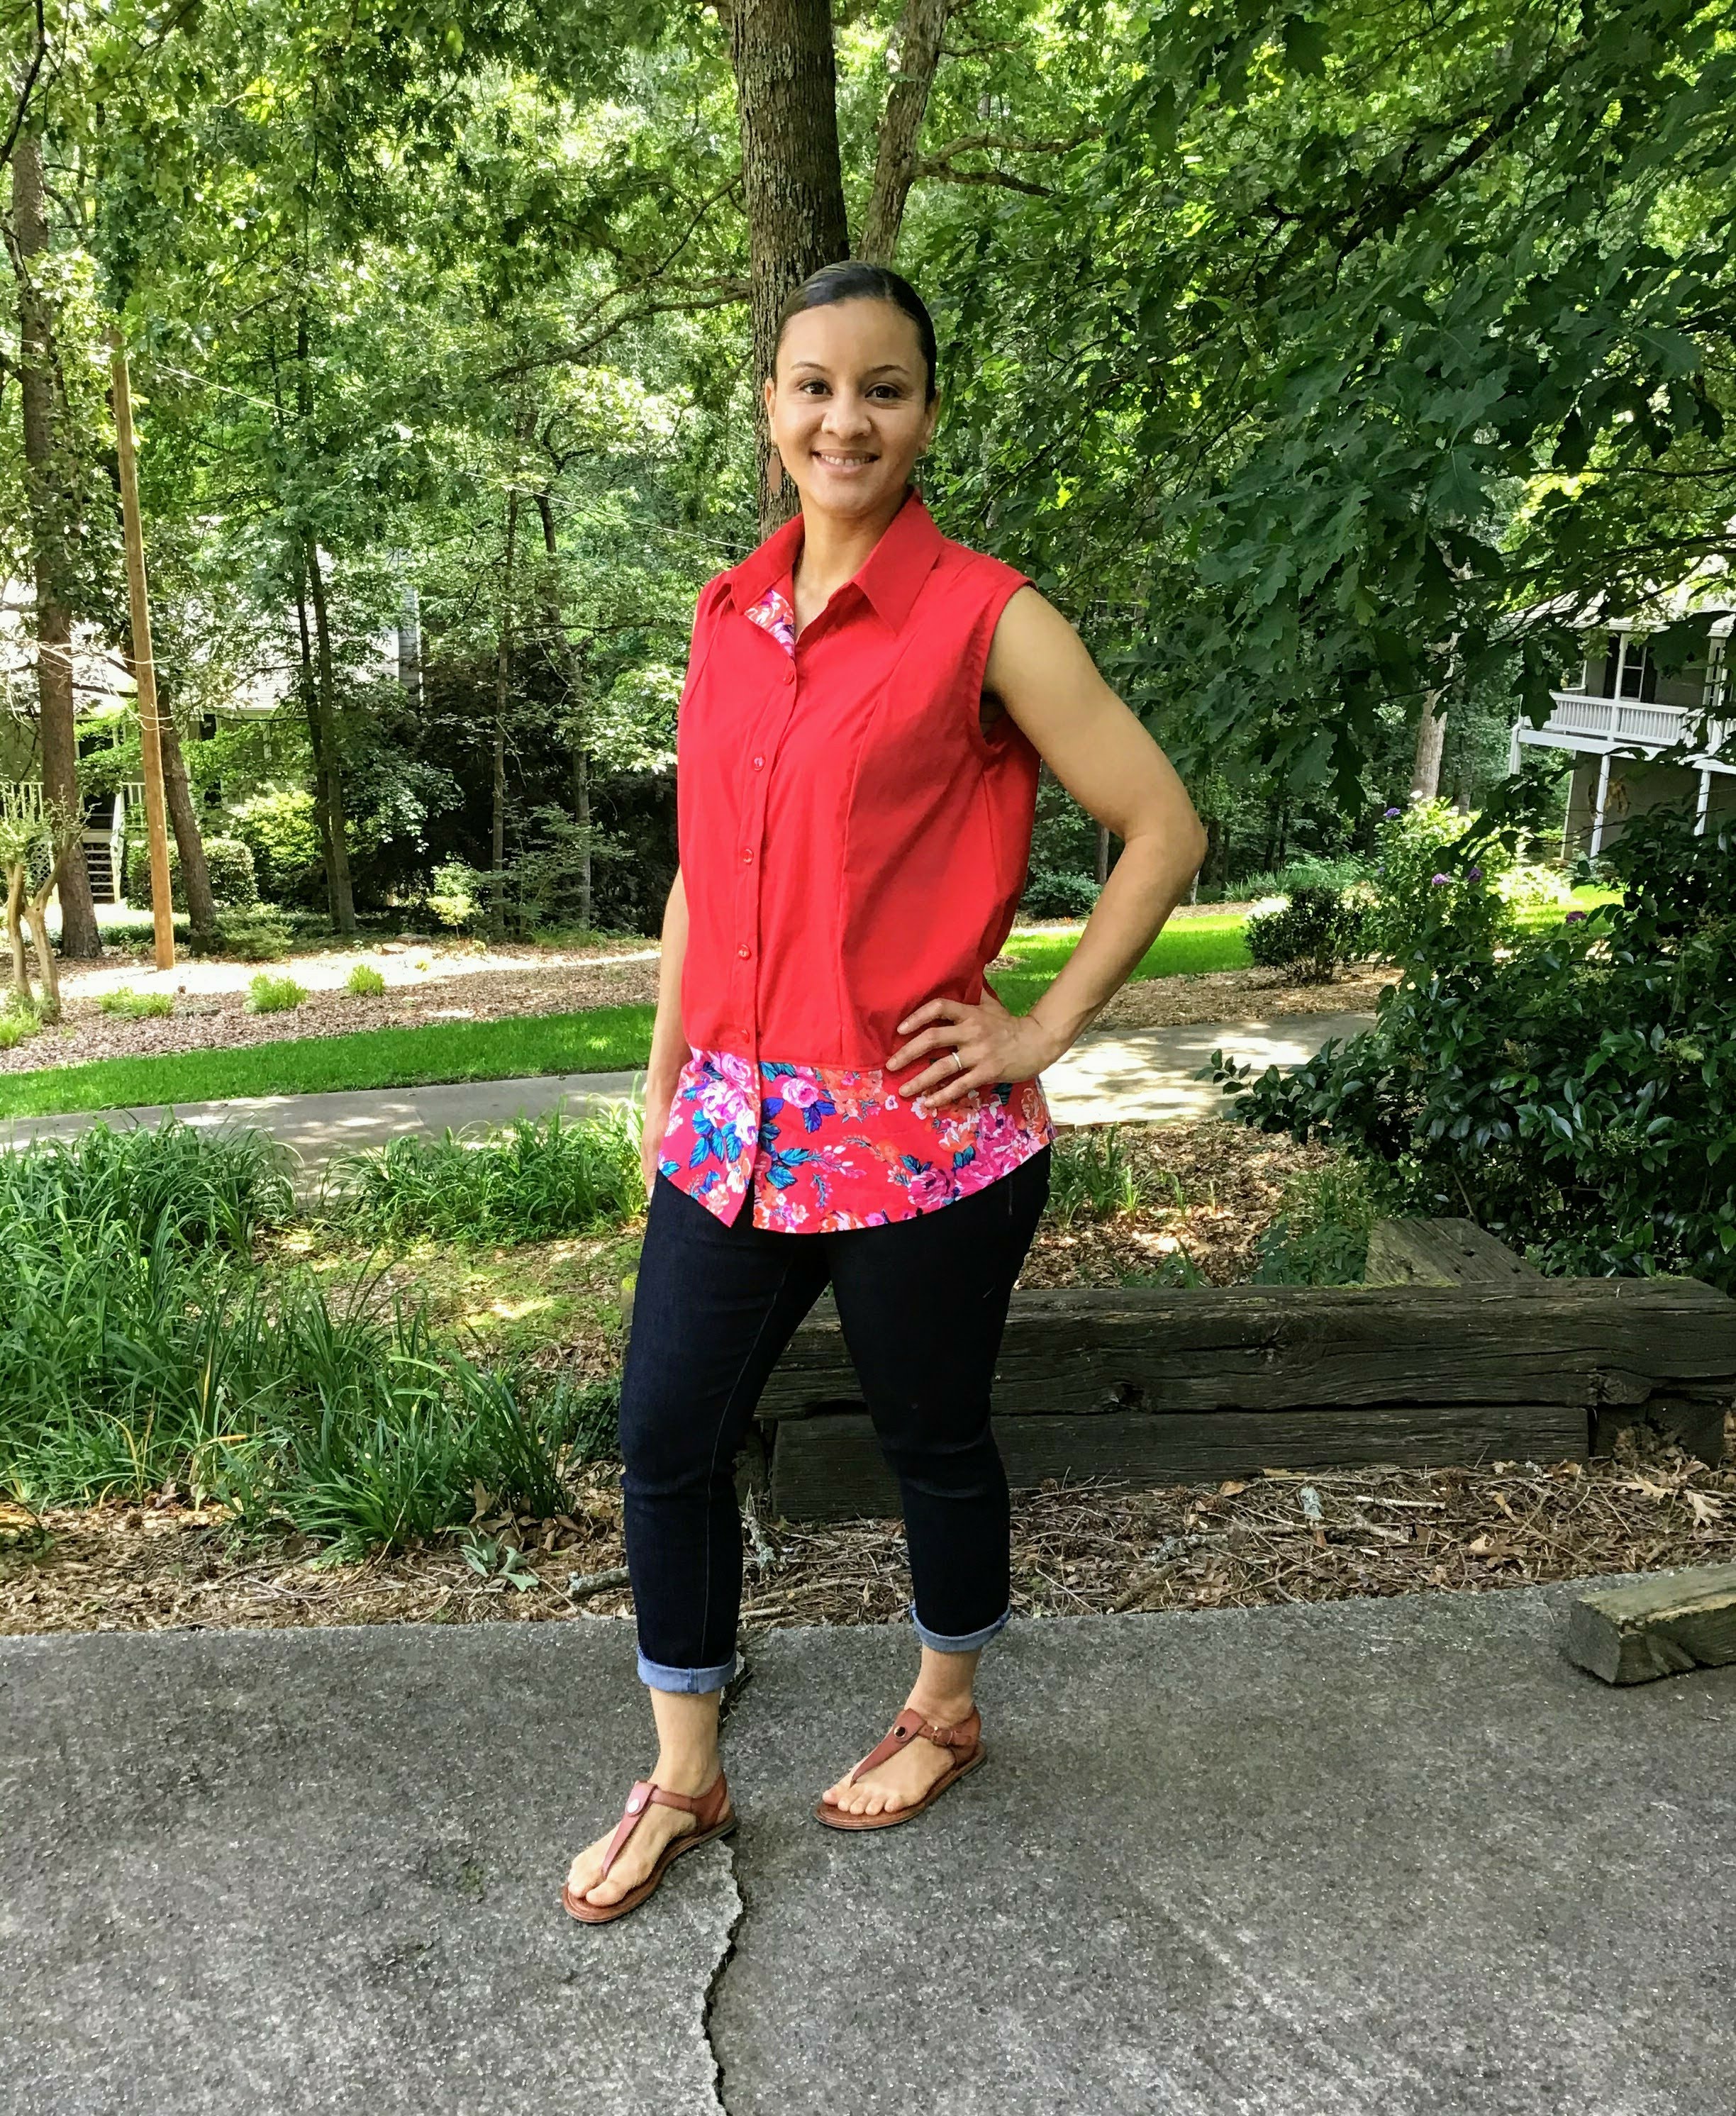
I think the final result is much more to my liking than my Willis muslin.  This is a size 4 graded to 6 in a beautiful rayon/poly challis I purchased from Nick of Time Textiles.  They have a lot of great bottomweights, and when I happened on this fabric while looking at twills, I purchased it for a drapey button up.  Structured or drapey, you can have so much fun with button fronts depending on the fabric you use!! I would love to make more flowy shirts like this one.


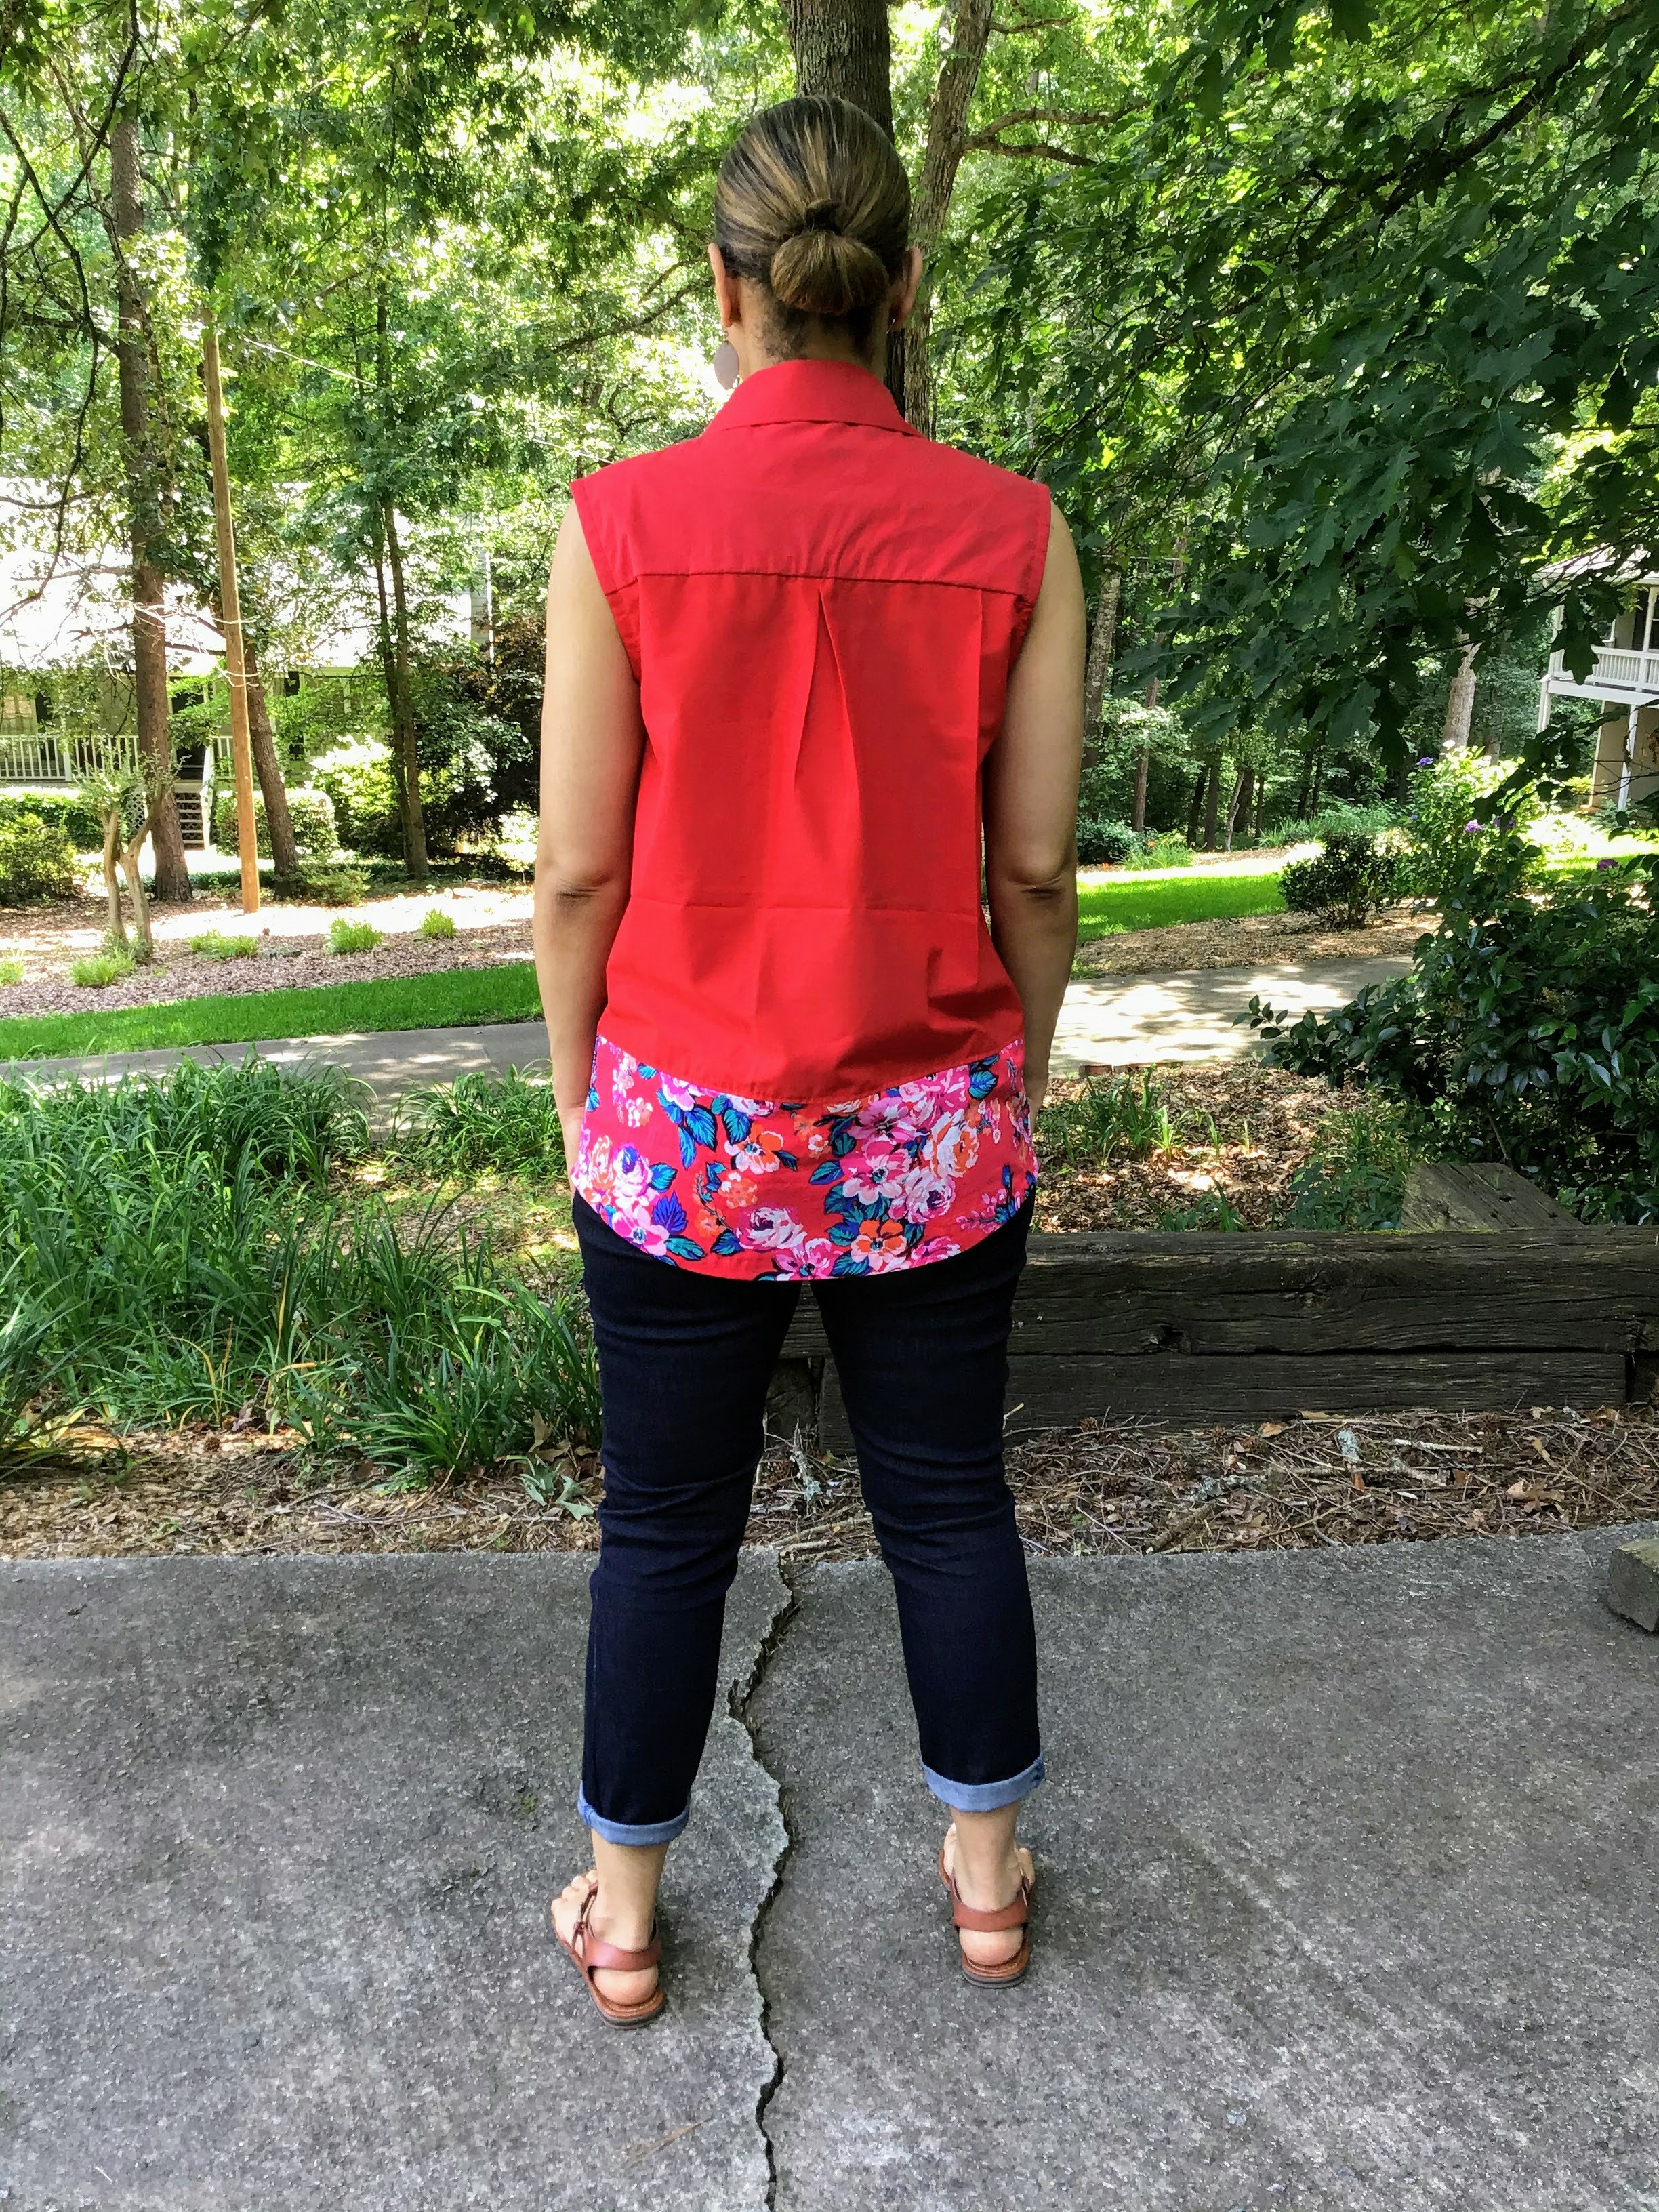
Somehow the back looks SO long, lo! I went back and checked my pattern pieces to make sure I cut the right length, and saw that I did.  I have made this shirt twice before and thought I would breeze through the construction, but I totally forgot that the placket takes a little more time.

Here is a short run through:


  1. Place you properly interfaced placket piece on the shirt front.  The right side of the placket will be on the wrong side of the shirt front. Stitch around perimeter as marked.
  2. Cut straight down the middle of the opening (it will be fine, promise) and about 3/4" from corners. Cut up to each corner without cutting the stitches. You will form a triangle wedge.
  3. Turn the placket to the right side of the garment and press. Make sure the edges of the placket are tucked under 3/8." They will line up and cover the edges of stitch line.
  4. Fold the left side of the placket to center front. Topstitch 1/8" on the outside of the placket, stopping at the triangle wedge.
  5. Do the same with the right side of the placket.
  6. Finish the long edge of the right placket by folding it under 45 degrees. Fold the opposite corner under 45 degrees to form a triangular tower shape. Stitch everything in place, and sew an X shape near the bottom.
Once I got past the popover placket it was smooth sailing. I did cut out and sew a pocket with the stripes going in the opposite direction, but I think it made the top look far too busy.  I always cut out the pockets for styles that have them. I sew them up, pin or baste them to the garment, and then decide whether I like it on me.  

Overall, I HIGHLY recommend the Kalle! It is a TNT for me, and such an easy Summer style.  This is another great advanced beginner and up pattern, but don't expect it to be a quick sew.  It took me two days to finish, and I took my time on the bias tape finished edge (love it).  

I am not sure what I will be sewing next, but I will check in with you again soon.  

Stay sew filled!


Tuesday, June 9, 2020

Sewing the Rhapsody Blouse

Hello everyone!

Today I encourage you to come along as I sew up the Rhapsody Blouse from Love Notions.  I first saw amazing versions of this pattern on the Tomkat Stitchery channel on YT.  I have sewn the Love Notion's Canyon cardigan in the past with ok results, so I wasn't sure if I wanted to give them a try again. When I saw Whitney's versions, and found out that the Rhapsody blouse was re-released (at that time with a discount), I decided to give it a shot.    


As you can see, I added an inch to the length, and used a lovely rayon challis I had in my stash. I decided on a size S, and created the double fold bias for the neckline. My plan was to leave off the ties.  

So far, this is my favorite Love Notions pattern!  I love the instructions, and the simplicity of the construction methods.  It was pretty smooth sailing for me with only one minor hiccup that I will address later.  However, I was impressed with some of the techniques for this blouse.

One of my favorite methods is the way they construct the back pleat on this blouse:

I know my fabric is a little distracting and some of the details are hard to see, but I tried my best to capture some things as I sewed.  

Continuing with the back construction...

For this part you sandwich the back yoke and yoke lining around the back.


When you press the yokes up, and remove the pleat basting stitches, you already have the back complete!


On the front, you can easily sew your gathering stitches, then align the main yoke RST.  Pull up the basting stitches and match the width of the yoke shoulders. Baste again.

Now comes the FUN part: Roll up the front and back to the inside to keep them out of the way.  Take the yoke lining around the rolled up portion to the back.  Connect the shoulders right sides of the yoke to the wrong side of the front (a little hard to see here). Stitch.

Once you pull everything out, it looks so lovely! 

For the sleeves, I always like to serge the bottom edge first.  Then I assemble them, and prepare to attach them to the garment.  In this case, I put in the gathering stitches, then eased them in the round of the armhole.

Now onto the neckline...

For the bias bound neckline, you start by finishing the "V"neck portion first.  Then the rest of the neckline is done.  It lays beautifully when you are done, though it took a little time fiddling with this to get it right.

I finished the hem for the sleeves and bottom hem the same--serged the edges, folded up 1/2" and stitched.  You can also narrow hem or coverstitch them.

And for the FINAL result:


Overall, I absolutely LOVE this blouse!  As you can see, the construction was all very simple, and I am such a fan of the gathers on the front bodice.  I think an advanced beginner can pull this off for sure. My only speedbump was the neckline.  I think it will go easier on my next version.  But for now, this will be my entry into #fayestopsthatpop.  Once I take some photos in it, I will post them to the blog.  For those of you who stated that you had this pattern, I hope this rundown gives you an idea of what to expect.  I highly recommend it, and think the silhouette is so lovely when you wear it.

For my next top pattern, I will be sewing up the Seamwork Willis:


I still need to choose a fabric and get my pattern cut out, but I do have the pattern pieces ready.  I am thinking of stripes for this top, and I just love variations of a button front shirt.  I will be getting started soon so I have a chance at meeting the June 15th deadline for the challenge.  

Stay sew-filled!


Thursday, June 4, 2020

May Recap/Review and June Plans

Hello everyone!

I pray that you are all staying safe, and keeping yourself together after the emotionally charged week this country has had.  I spoke about this in my last post, and truly appreciate you allowing me to be heard.  You all are wonderful, and I am thankful for you!

Today I am sharing the "thing" I sewed in May.  Yes, that's right.  The one and only thing.  I know I usually have a bunch of garments (sometimes mostly beloved basics), but I admit that May was a different month for me.  I am proud of the one thing I was able to squeeze out and that is Simplicity 8053:


I made View B, the sleeveless version with colorblocking.  It is a vision that I have had in my head for YEARS, lol!  I used two stretch poplins from my stash, one in a floral print, and another in red.  They were Fabric.com purchases a long time ago.  A small portion of the back was done in solid red cotton because I ran out of the red poplin. Thankfully, it still worked out!


I made a size 14 graded to 16. This pattern is OOP, but has cup sizes.  I was right on the verge of an A cup, but came out with the B instead.  If I make another version, I think I would size down to the A front, especially with a stretch woven fabric.  I took about 1/4" out of the princess seams up to the bust point, and that did help some of the bagginess.  

So if you are sewing this pattern, or plan to sew it, be aware that there is no yoke lining for this shirt.  If you know me, you know I love a yoke lining! If I can add extra fun details to a button front shirt, I want to do it! I ended up cutting an extra yoke piece and following this tutorial in order to create the lining, which I did in the floral print.  I also used the print for the armhole facings and the inside of the button bands for some contrast:


The rest of my seams were neatly serged and stitched.  For interfacing, I tried a new one called ShirTailor by Pellon.  I purchased it from Fabricmart Fabrics since it was specifically for crisp cuffs and collars.  It held together nicely, but I think I like the medium weight fusible I buy at Joanns (Fusible Midweight 931 Pellon) a bit more.  I still have loads of the ShirTailor, so let me know if you have any special advice or helpful hints for it.


As far as construction goes, this shirt was a pleasure to sew!  That could be because I love sewing shirts, but I also think an advanced beginner and above would do well with this pattern. The instructions were clear, and it has nice details like the pleat in the back.

My six red buttons came from Joanns.  I think they are 1/2" in size.  I bought a bunch of buttons a few months ago in all kinds of colors when Joanns was having a big sale.  They have come in so handy now that I am sewing shirts, especially since the majority of them are neutrals.  The only thing I decided to leave off of this shirt was the flap pockets.  They were just too large for my liking.


Overall, I am a fan of this one and recommend it!  If you have sewn it, let me know!

For my June Plans, I haven't totally decided on all I will sew.  My birthday is at the end of this month, and I will be turning 40 so I would love to sew a dress even though I plan to be in the mountains somewhere with my family, lol!  I will update you on that once I make any decisions. 

 I can tell you that I am excited to kick off TOPS THAT POP, hosted by Nakisha at Dressmaking Debacles for these next two weeks.  This challenge is in honor of a fellow blogger named Faye who passed away.  I knew Faye through her blog Faye's Sewing Adventure, and she would comment on my blog from time to time.  She was kind, knowledgeable, supportive, and an all around great lady.  I am happy to contribute to this challenge of hers--especially since I participated in it twice while she was alive.

If you would like to join, see the post here.  

I may be posting a bit more often in the next couple of weeks as I take you along with some of the things I decide to sew.  I think it would be fun to share sewing choices, and what the outcome is....good or bad.

I am starting with the Rhapsody Blouse from Love Notions:


I chose a Rayon Challis purchased from Denver Fabrics last Summer, and have already cut out my pattern.  I will be back soon to show you how things are coming along, and tell you which version I chose.

Thanks for stopping by today! 

Stay sew filled!


Wednesday, June 3, 2020

A Time for Change

Hello everyone!

I planned on writing a sewing post yesterday, but decided that participating in #BlackoutTuesday was a much better use of my time.  In case you missed it, June 2nd was a day to pause our normal interactions and posting online in order to raise awareness against systemic injustice, and stand against racism.  By stepping away from social media, the encouragement was to pause and learn, to seek out information and listen, and to become educated on inequality that has plagued our society for so long...  

I took the time to do some of those things, and to examine my own heart in the midst of this tumultuous time.  I can honestly say that I don't know how to feel most days.  With the death of George Floyd following so close after the death of Ahmaud Arbery, the pain has been too deep for me to even comprehend.  Some days have been filled with mourning, and others just walking around numb.  Is this the world my children will grow up and experience?  With all that I teach, love, and show them, will it be enough?  

I don't have the answers, but I am encouraged by the sparks of change that have been ignited.  My prayer is that all our voices would join together to fight this battle, and provide effective solutions for the problems at hand.  The important thing is that we would all resolve to do something, and not let this issue die out. 

If you are wondering what you can do, then this article is a great place to start: https://www.timeout.com/things-to-do/how-to-support-black-lives-matter.  

I plan on posting a May recap and June plans post tomorrow, but please know that this issue does not disappear because it isn't directly spoken about in my posts.  As a Black woman, wife, and mother, I am this issue.  I speak about this because the value of Black lives has been misplaced in our society. While I have always believed that my life, and the life of my family members has mattered, there have been times when we have been treated differently.  And there are certainly countless stories of unjust treatment rooted in deep ties of racism and hatred. 

Again, we are not powerless, and there is something we can all do!  

Thank you for hearing my heart today!